Reclaimed Entry Closet
/The last week (or so) I've been working on a super easy project - fixing up my entry way closet. It may not seem like a big project - and it wasn't - but it was time consuming. So why fix up your entry closet you ask? Because I'm tired of the daily "Where are your shoes? Where is your backpack?" as we are heading out the door for school. And, to be honest with you, it kind of became a place to put stuff. There was no thought behind what went in there. It was basically a catch-all for anything I couldn't find a place for. I had heard once that if your entry is cluttered, your home is cluttered. Who knows the logic behind it, but I decided to see if organizing it would make other things move smoothly (it was worth a try, right?)
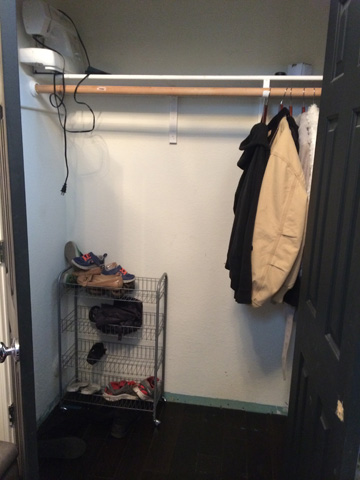
The closet before
the junk from the closet
wood displays
As you can see, it was a standard builder grade closet with the standard pole and not much else (not even baseboards!). The last pic is one of the wood displays I had built for a home show in August. I used them once and realized they were way too much work to be useful going forward. For months they've been laying in my garage, taking up my parking space. And then I had a thought. I've always loved wood plank walls - why not use this wood in the entry closet. That's all it took to get started. I cut the wood in varying lengths and began nailing them up.
After I got the wood nailed up my husband walked downstairs and immediately asked "you are going to paint that, right?" Yeah yeah. I tried sanding it down and that was messy and just not working. I just decided to prime it and go from there.
after the wood was up.
primed
This is where I got stuck. For the life of us, we could not decide what color to paint it. I tried giving it a gray wash. That was terrible. Then we tried the gray from our bathroom. Nope. Finally the hubs suggests I paint it blue to match the front door. After all, I love the color of the front door. I decided to give it a go. And wouldn't you know, we loved it! Once the paint dried I took some old shelves from the master closet remodel, cut them down and created shoe shelves in the nook. I used hooks from the displays for the coats/backpacks/hats/purses (you name it). I stumbled across super cute bins at Office Max and bought a piece of trim for the floor (it doesn't match but I'm not stressing about it right now). So how did it turn out? Check it out!
Yes, that is a ginormous picture of a gun. it's a warhol and my husband loves it. sigh....
Before...
and after!
So there you have it! The only money spent was on the quart of paint, trim piece and bins for a total of less than $50. And although it wasn't a project I ever had on my list of things to do, I'm glad I did and I'm loving knowing where the kids stuff is in the morning (and where my bag and keys are!).
YOU MAY ALSO ENJOY:


