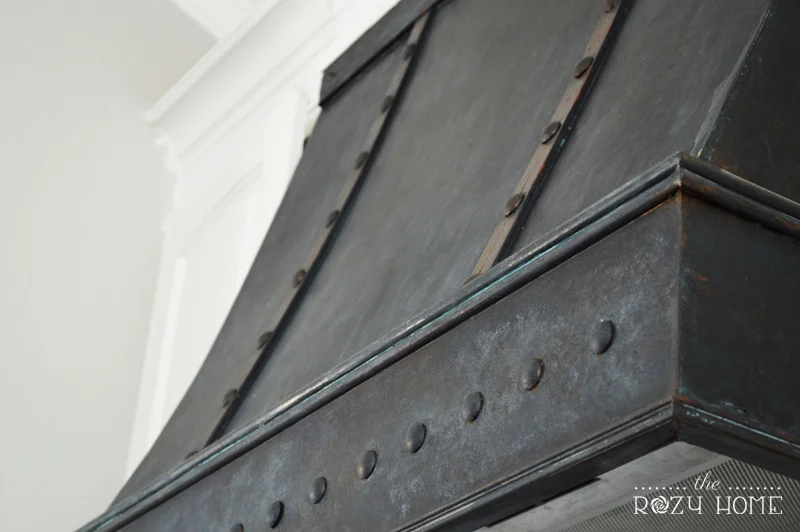
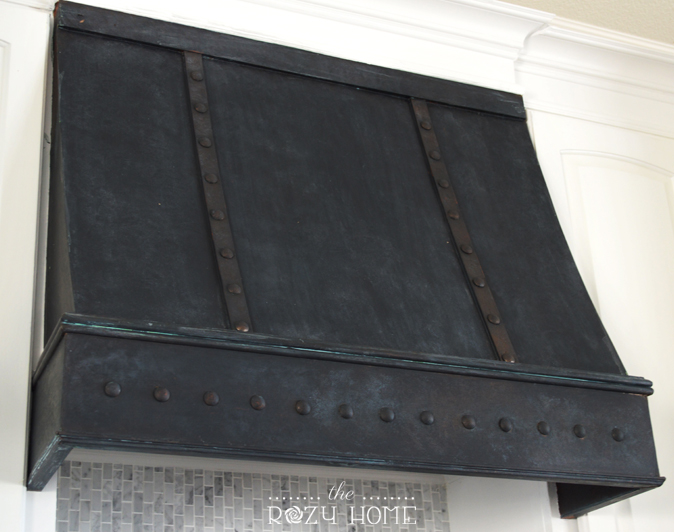
Builder Grade to Bronze Beauty (DIY Bronze Range Hood)
/Update: I have received a ton of questions about the Modern Masters paint. For those of you who can't get it locally (or even those who can), it is available on Amazon. I've attached affiliate links for those interested. Hope this helps!
Man, what a week. I've been running myself ragged this week. Usually that means stress. Stress means DIY. DIY always puts me in my happy place. With that in mind, I decided to knock out a project I've been tinkering with the last few weeks - the range hood.
It's been a while since I've shown the kitchen, so here is what it looked like when we bought the house 5 years ago.
After painting the cabinets, I decided to remove the microwave (I'm not a fan of microwaves buzzing at my head. I took it out and bought recirculating vent to replace it).
It looked like this for a couple of years. Then one day, I had an a-ha moment and decided to create a range hood. You can check that tutorial out here.
I liked it much better but there was still something more I was looking for. After looking at it for a year I knew I wanted to bump it out a bit more - so I did. It looked like this for a week or two because I wasn't sure what color I wanted to do.
I have always been in love with bronze hoods. What I haven't loved is the price. If you've looked you know they are between $2000 - $7000. Yikes! I decided to set out to see if I could find some bronze sheeting to cover the hood as an option. Somewhere while surfing the web I hit the jackpot. I found Modern Masters. If you haven't heard of Modern Masters (I hadn't yet) then you have to check them out (you can find their site here). They make a ton of amazing paints, but what caught my eye was their Metal Effects line. They offer 3 reactive paints - copper, iron and ... BRONZE! Once I saw they had bronze paint I decided to check their Modern Masters Cafe to see what others had done. I fell in love with a range hood that was made to look like oil rubbed bronze. There was no tutorial, so all I knew is that they used bronze with green patina. I checked out the Where To Buy link and headed to the closest store (which was about 30 minutes away). Luckily, they had what I needed in stock. Now for a cautionary tale.
The guy at the paint store told me I didn't need to use the Modern Masters primer. He, instead, told me to just use theirs. I had this weird feeling in the pit of my stomach but I thought the guy knew what he was talking about. He didn't. I wasted about half a bottle of the bronze paint trying to figure out why the paint was not reacting like it was supposed to. I took to the internet and sure enough, best results come from using the Modern Masters primer. Sigh.... Another 30 minute trip to the paint store and I had what I needed.
That night I painted the hood with the primer. I let it sit 24 hours (per the instructions).
I have to admit - looking at this burnt orange hood was a little rough (being in Austin and a bit tired of all the burnt orange floating around).
After the 24 hours, I painted on the first coat of bronze paint.
The instructions say to let the first coat sit for 30 minutes and then paint the hood again. While the paint was wet, you have to add the green patina. I opted to use a paint brush to do this. After a few minutes, the hood looked like this.
After 15 minutes
After 30 minutes
It's a bit hard to see in the pics, but you could see the brush strokes when the light was on. That drove me crazy. I decided to grab a lint rag and sponge on another coat of bronzer. After sponging on the bronze paint, I sponged on the green patina. Note: I wore gloves during the process and suggest you do too.
Sponging on the bronze paint.
Sponging on the green patina.
I waited 30 minutes and then the range looked like this:
I took a picture with the light on so you could see the texture from the sponging.
Admittedly I didn't love the sponge marks either, but after a couple of days it evened out and looked great. Now, most people would probably stop there. I mean, let's check out the progress so far:
At time of purchase.
1 year after purchase.
3 - 4 years after purchase.
5 years after purchase.
Still it was lacking something. I just wasn't sure what it was. And then I saw this stunning range hood from texaslightsmith.com.
Image courtesy of texaslightsmith.com
Isn't it GORGEOUS! Although it isn't exactly the same design as mine, it gave me inspiration. I headed to Hobby Lobby to look for tacks and found these:
Image courtesy of Hobby Lobby
They were only $2.99 for a pack of 20, so I purchased two packs. When I got home, I grabbed a piece of cardboard and pushed them into the cardboard so I could paint them. Next I followed the same process of priming, doing two coats of paint and then treating with green patina.
Out of the package.
Primed.
Bronzed.
Patina.
While the tacks dried, I created a guideline for where I wanted to place them (with a level). Once I decided the distance apart I wanted them, I began to hammer them in (and checking for evenness with a level).
Unfortunately, my spacing wasn't so great the first time so I had to redo it. I'm sharing this because I want you to know it's ok to mess up. I just filled the unused holes with wood filler and sanded them. Next I primed, painted two times and added patina.
After about 30 minutes it was done. And the results? Check them out!
The total cost for the project was around $65 for paint, primer, patina and tacks (although I used only about 1/4 of the bottle of paint, primer and patina I decided to include the entire cost in the project cost). The great thing about Modern Masters is that you can add as much patina as needed to get the results you desire. To get more of the green look, apply the bronze paint quite thick and use a larger amount of the green patina. For my treatment, I used an average amount of bronze paint and patina as needed.
This has made such a huge change in the kitchen. I can't wait for all of you to see the entire kitchen project in the upcoming weeks! It is quickly becoming one of my favorite rehabs to date. :-)
Check me out at The Makers and Your Time To Shine link party.
It's That Time of The Year!
Cooler temps are rolling in and fall is knocking on the door. Check out the blankets my clients have called the "best blanket I've ever owned" at a special price for my Rozy Home fans!
The Maia 100% Portuguese Cotton Throw Blanket - Imported from France!
YOU MAY ALSO ENJOY:


