$15 DIY Rustic Headboard
/
Over the weekend we (the Hubs and I) were able to wrap up a few things. One of those thing was our son's headboard. Since we are doing a train theme in his room we thought it would be cool to do a DIY Headboard that looked like old train rails. After a bit of online browsing I found the design I wanted. I sketched out a few plans and headed to the hardware store to grab some materials.
Over a period of a couple of days we were able to create our very own headboard. And the cost? Around $15! Even better, this is an easy weekend project that just about anyone could do. To make it easy, I photographed almost every step along the way (some things were just too hard to photograph). Hopefully you will feel inspired to tackle this project yourself. :-)
Materials (based on a 48 inch tall headboard, measuring from the floor to the top of the headboard)
5 - 1 " x 6" pallet boards
2 - 46" 1" x 6" pallet boards
8 - 1 1/4 inch wood screws
4 - 1/2 inch carriage bolts with washers (that is, you need 1/2 inch carriage bolts - 4 total)
1 - 8 oz can Minwax PolyShades in Espresso
2 - 2 inch flat foam brushes
2 - 3 inch flat foam brushes
1/4 inch drill bit
1 sheet fine grit sandpaper
Drill
Screwdriver
T-Square
Measuring tape
Instructions:
Step 1:
Determine the width of your headboard. To make it easy, add 4 inches to the the width of your bed as follows:
Twin: Standard 39 inches + 4 inches = 43 inches
Full: Standard 54 inches + 4 inches = 59 inches
Queen: Standard 60 inches + 4 inches = 64 inches
King: Standard 76 inches + 4 inches = 80 inches
Step 2:
Cut the boards to the desired length. Note: Most lumber yards and home improvement stores will cut boards purchased from their stores to your desired length for free.
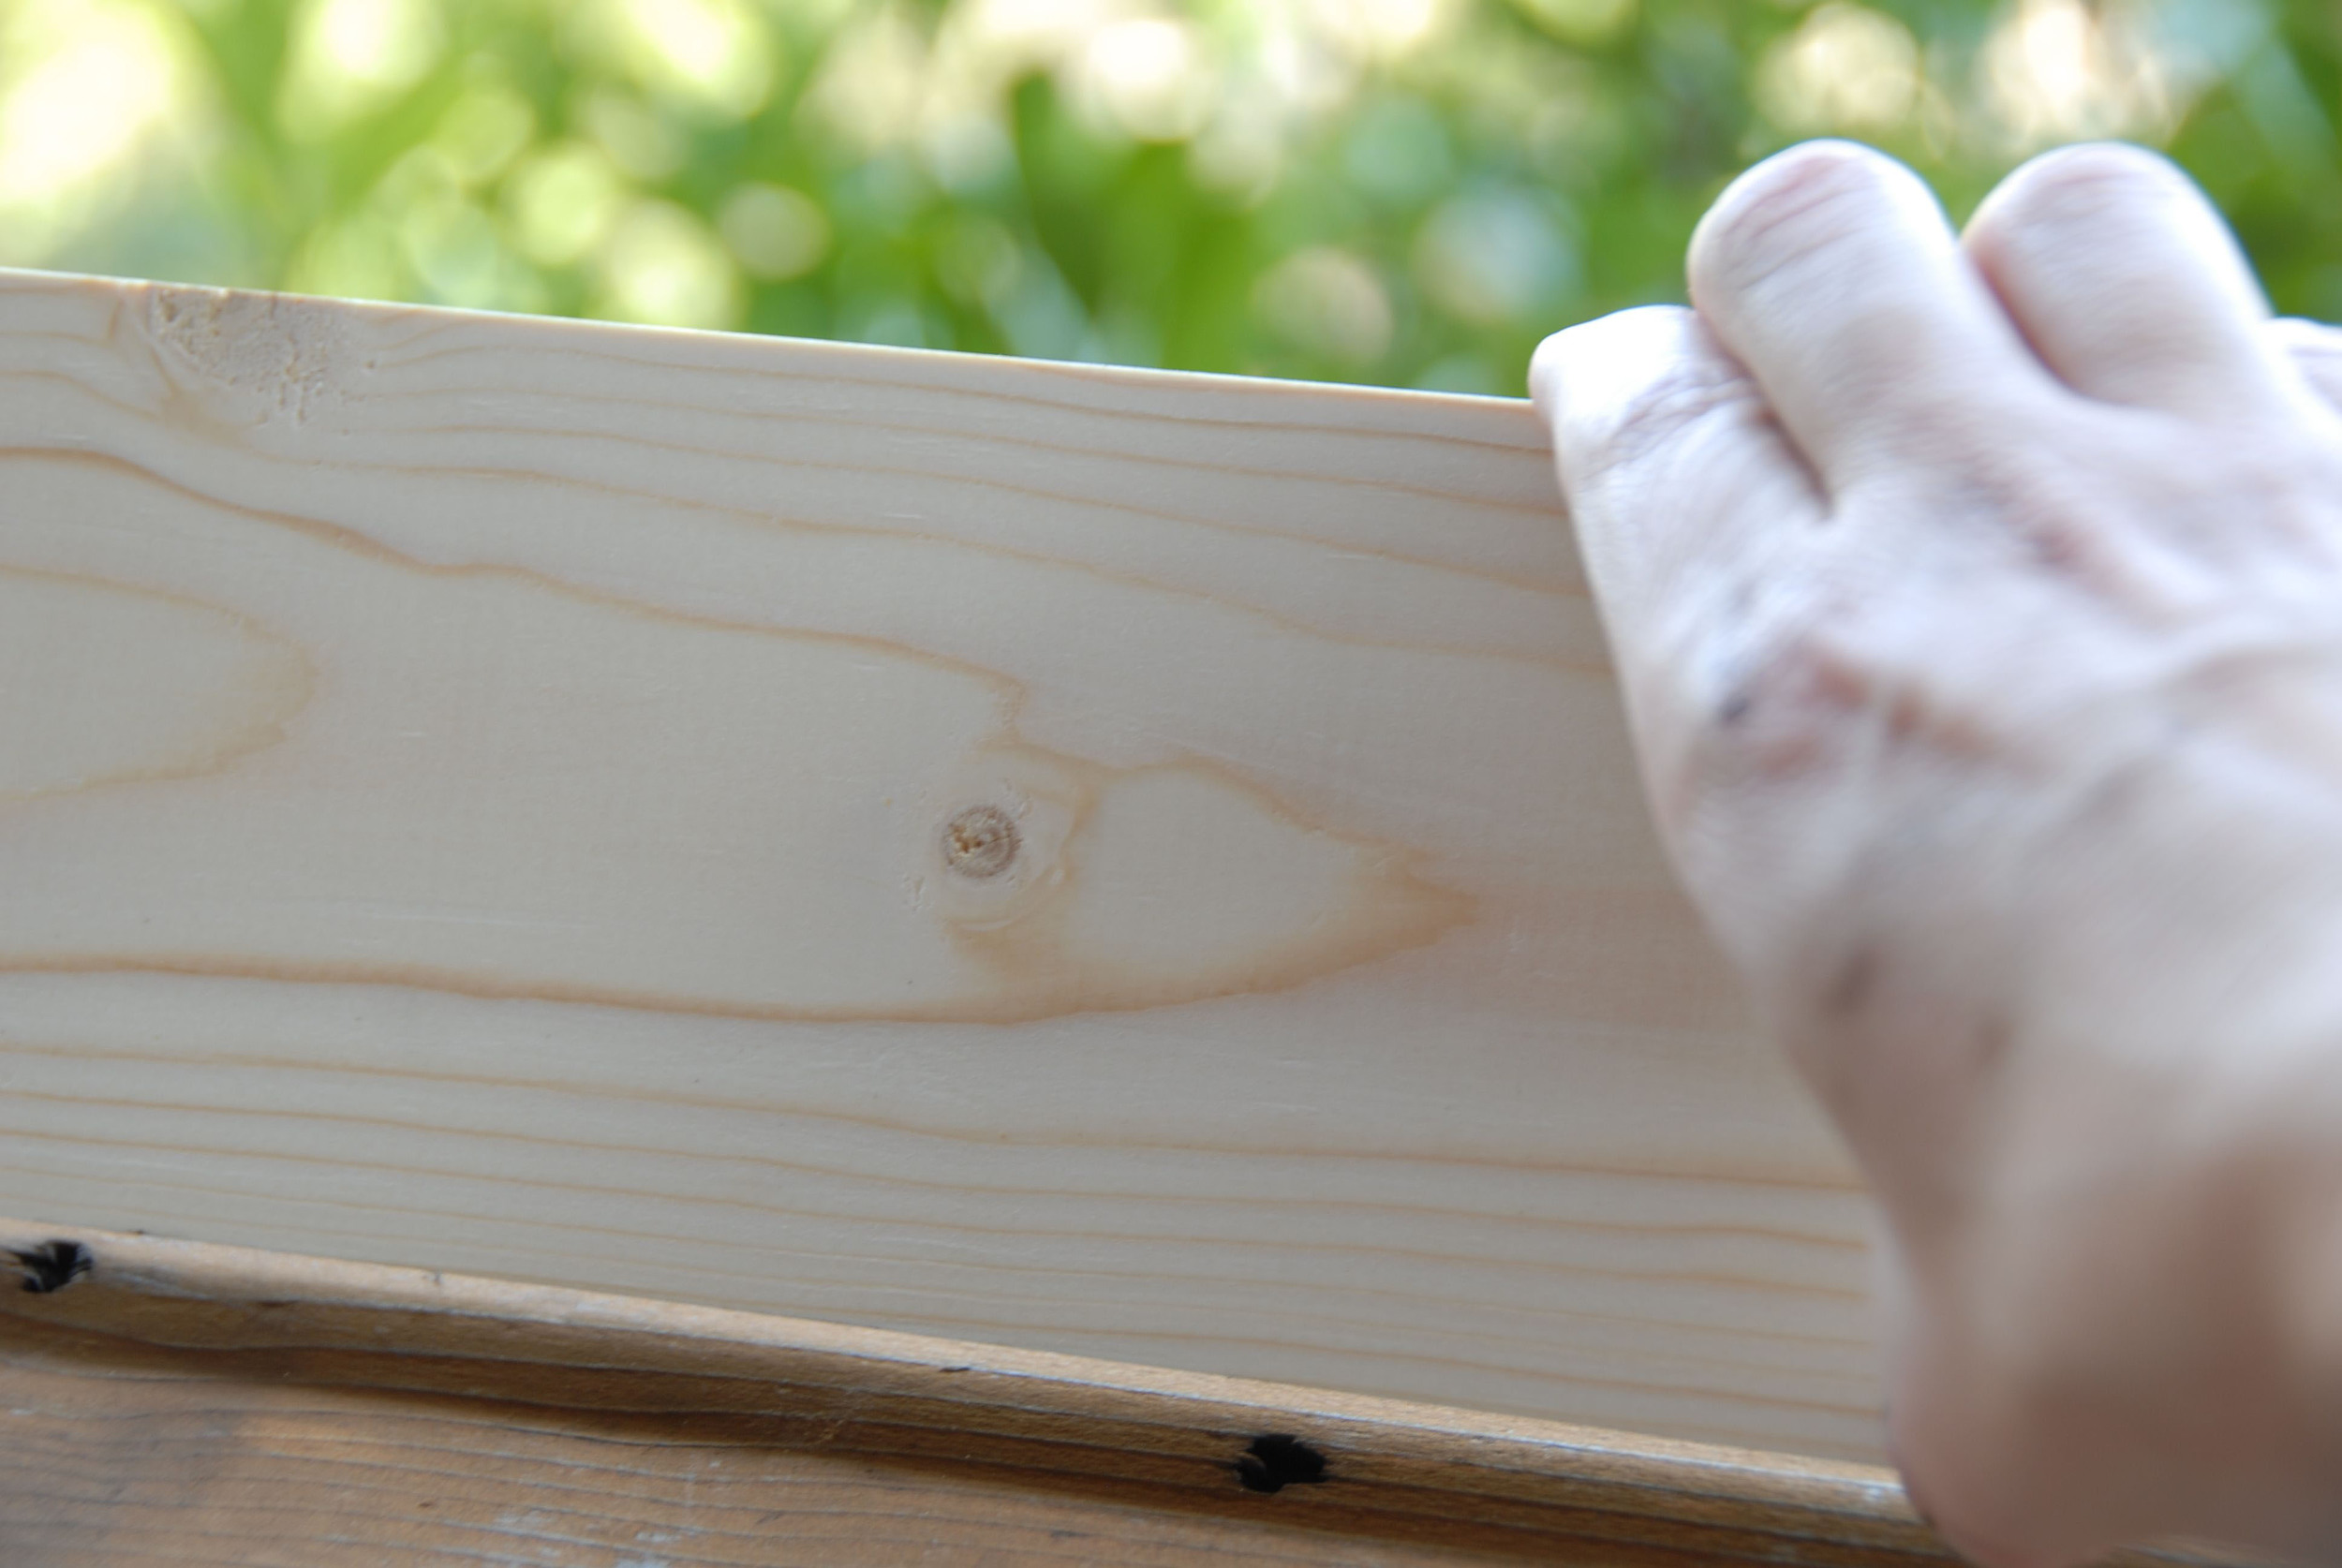
Step 3:
Sand the wood with a fine grit sandpaper. Remember to always sand with the grain! Note: I suggest using an electric sander and medium grit sandpaper on the edges of the boards to ensure all possible rough edges are smoothed out.
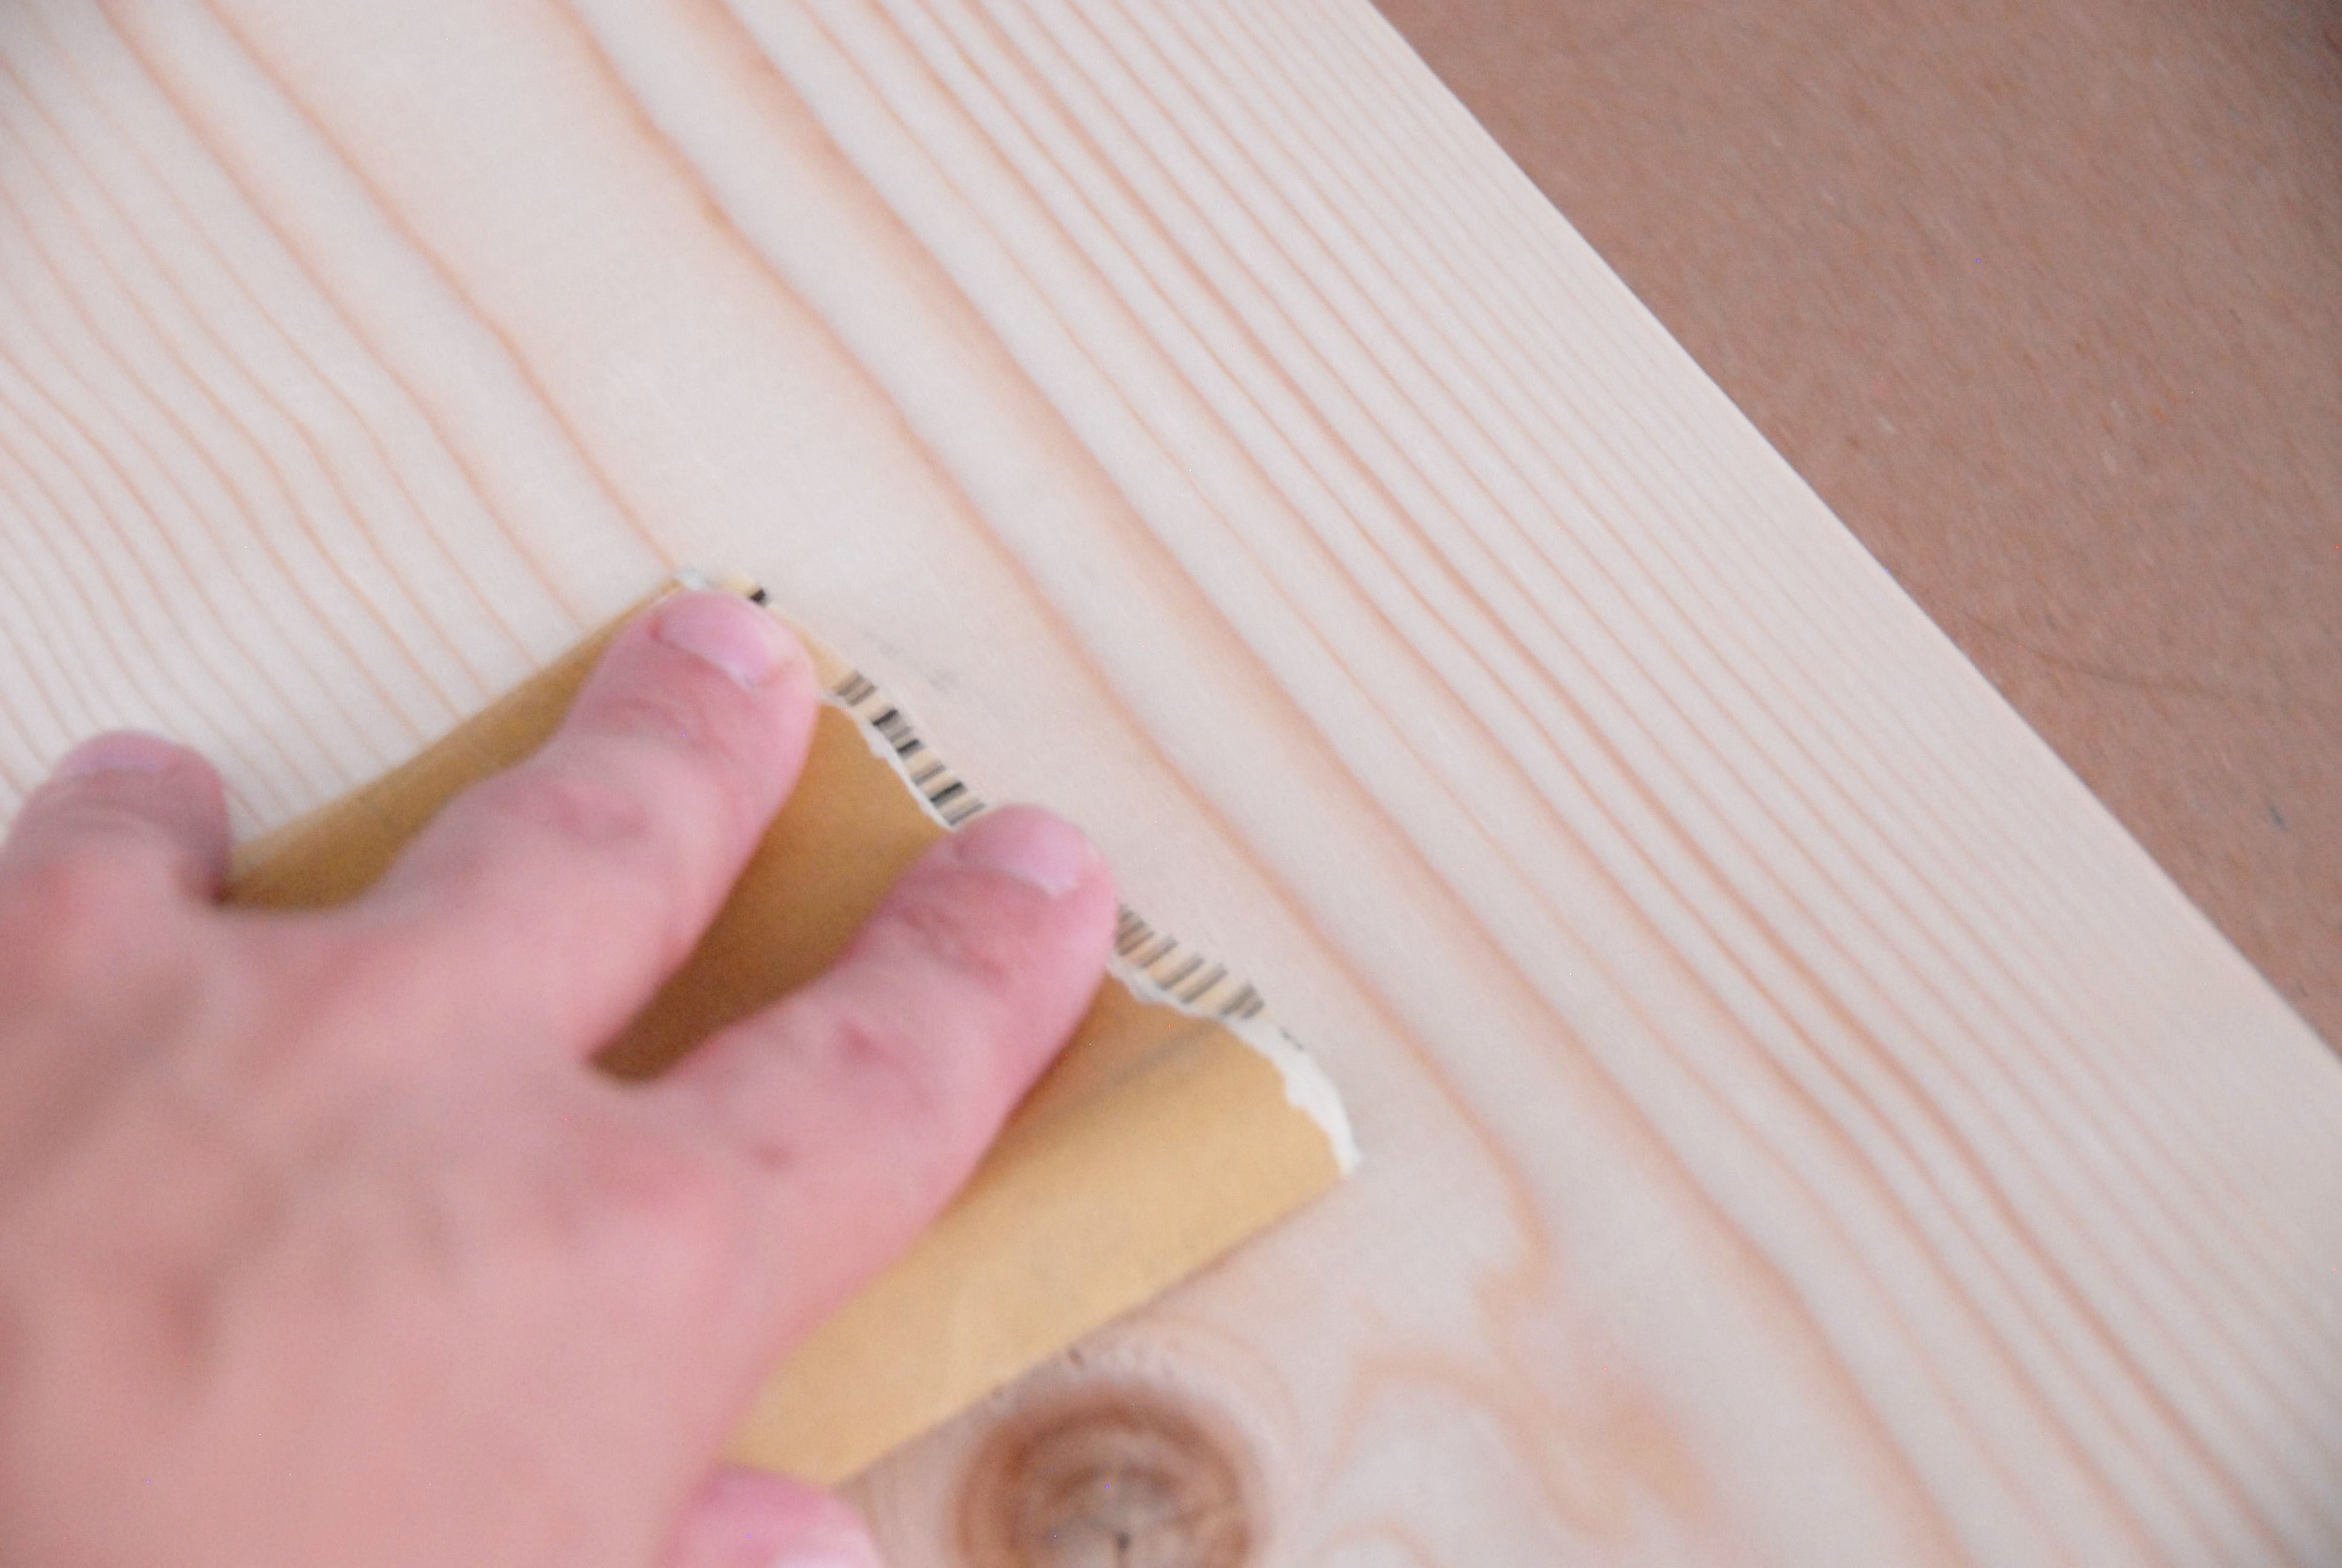
Sand the boards with fine grit sandpaper, going with the grain.
Step 4:
Wipe boards with a damp towel to remove any dust.
Step 5:
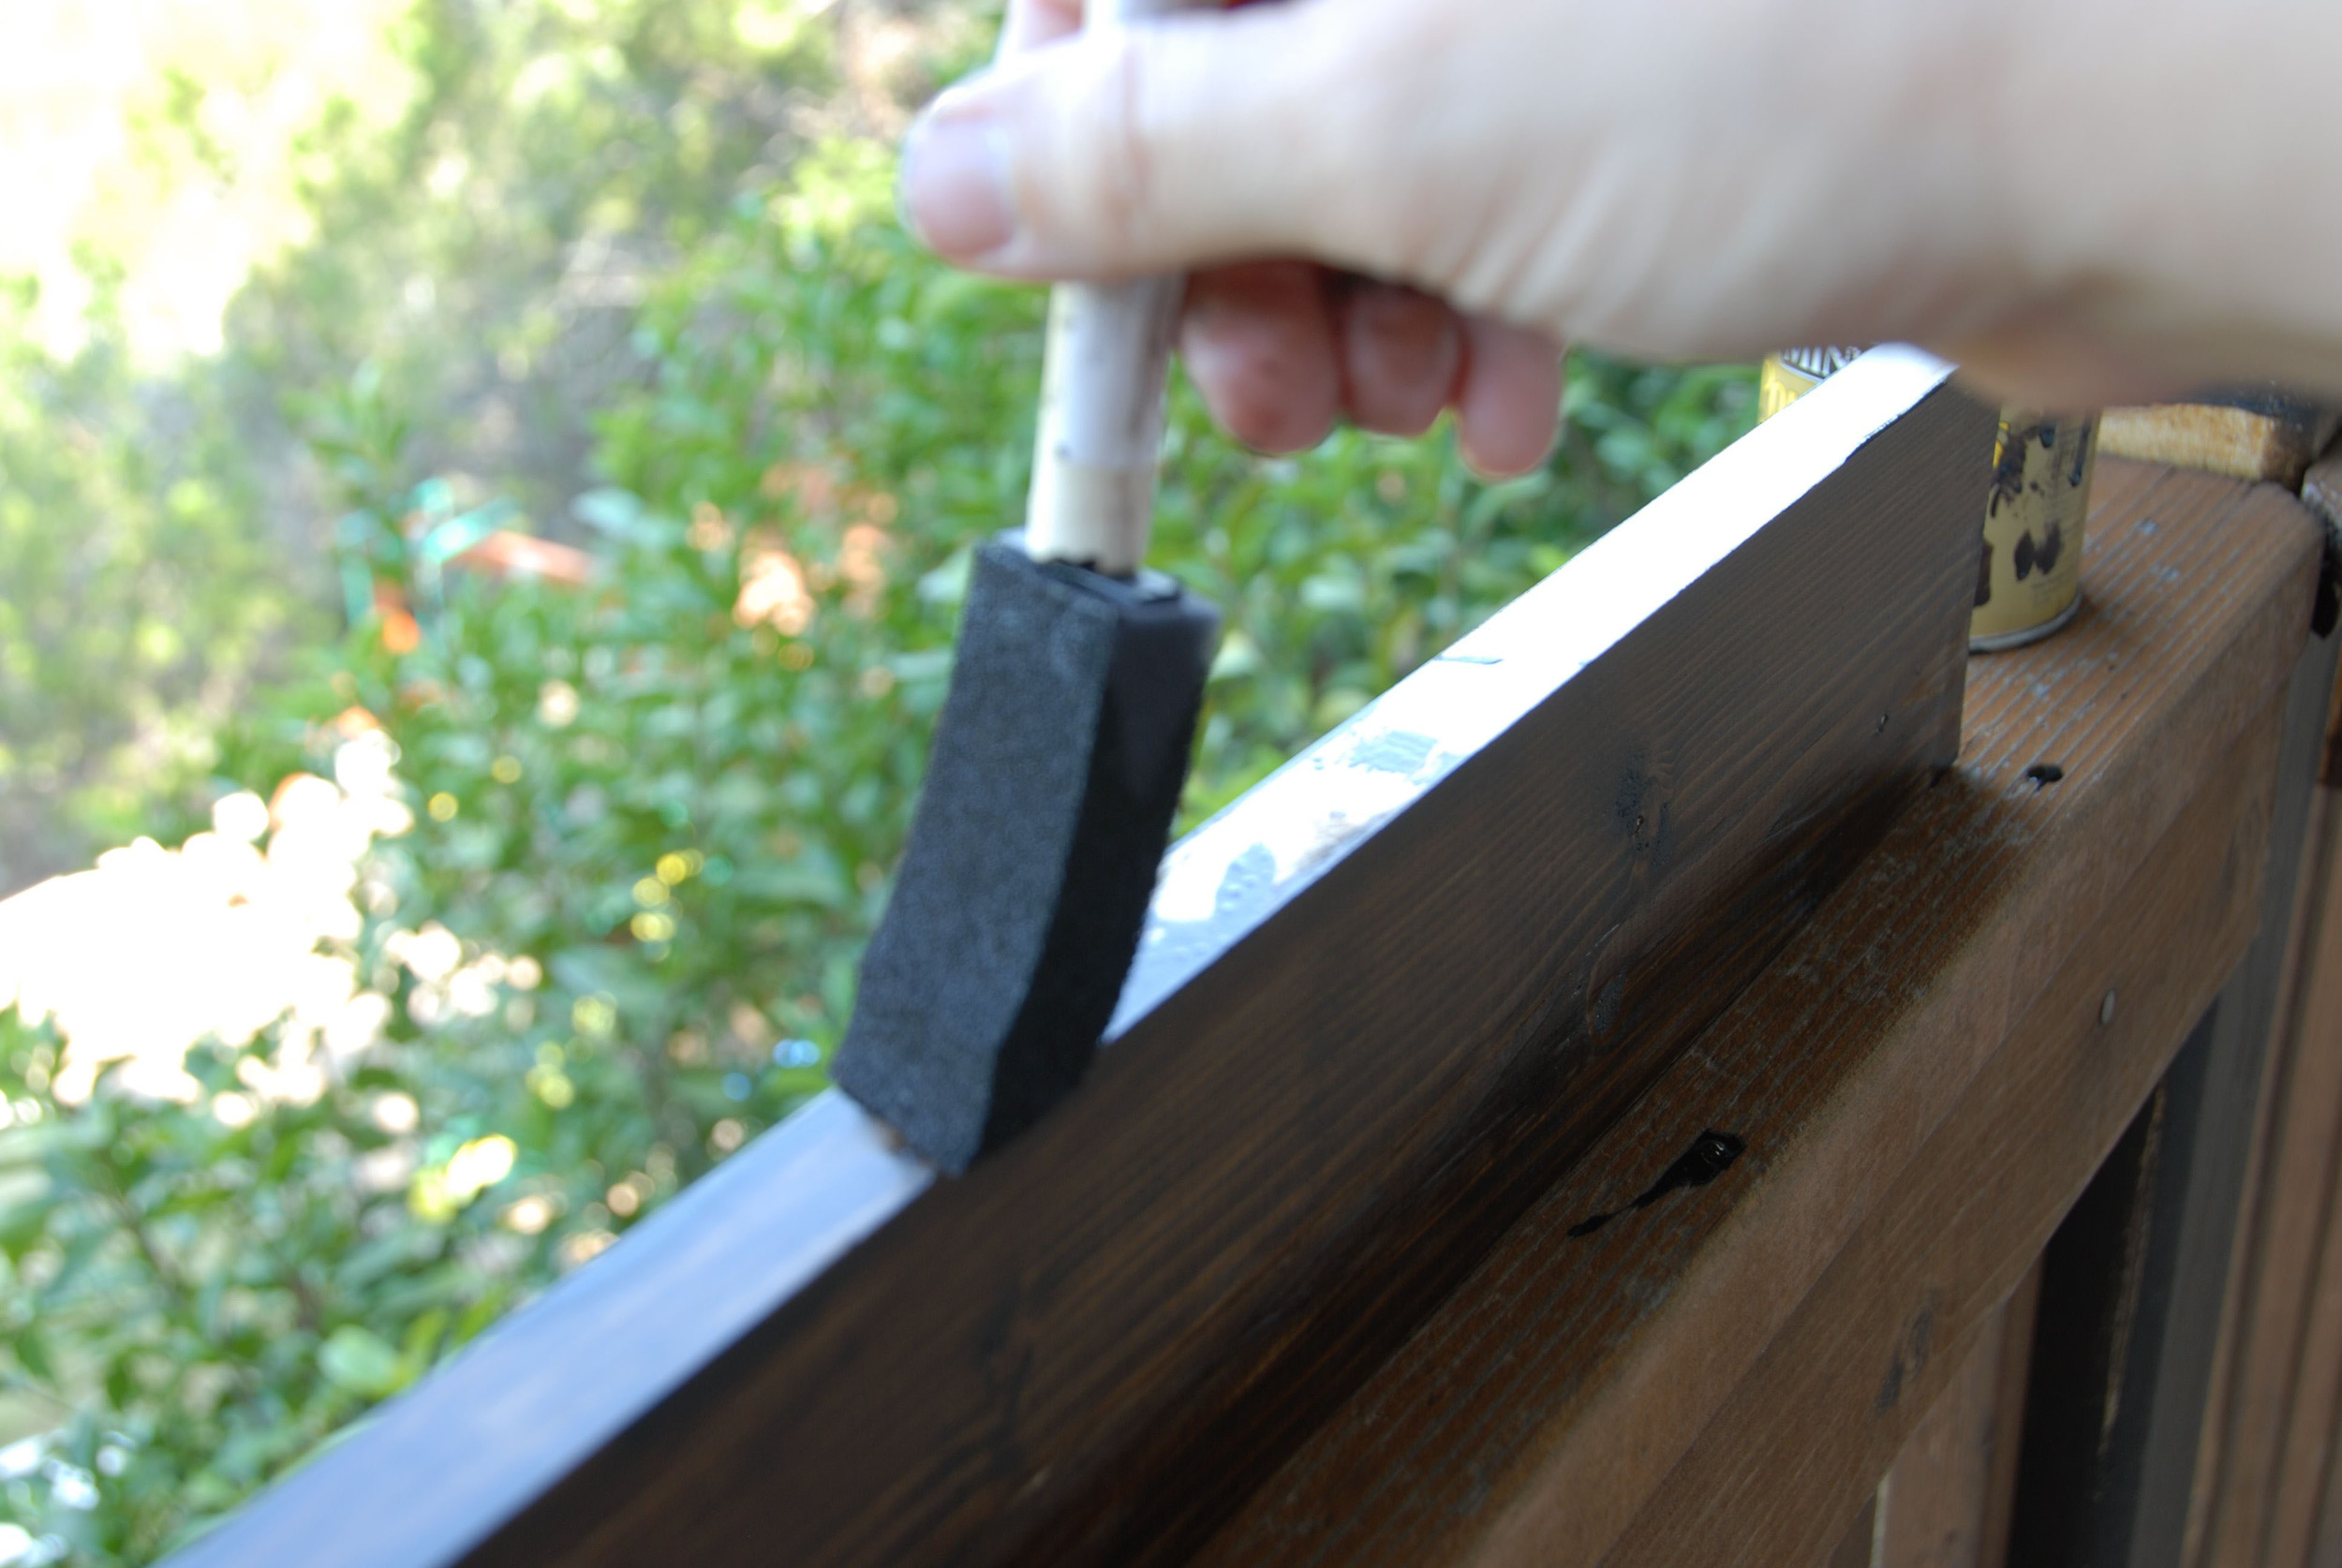
Apply a thin coat of stain, going with the grain.
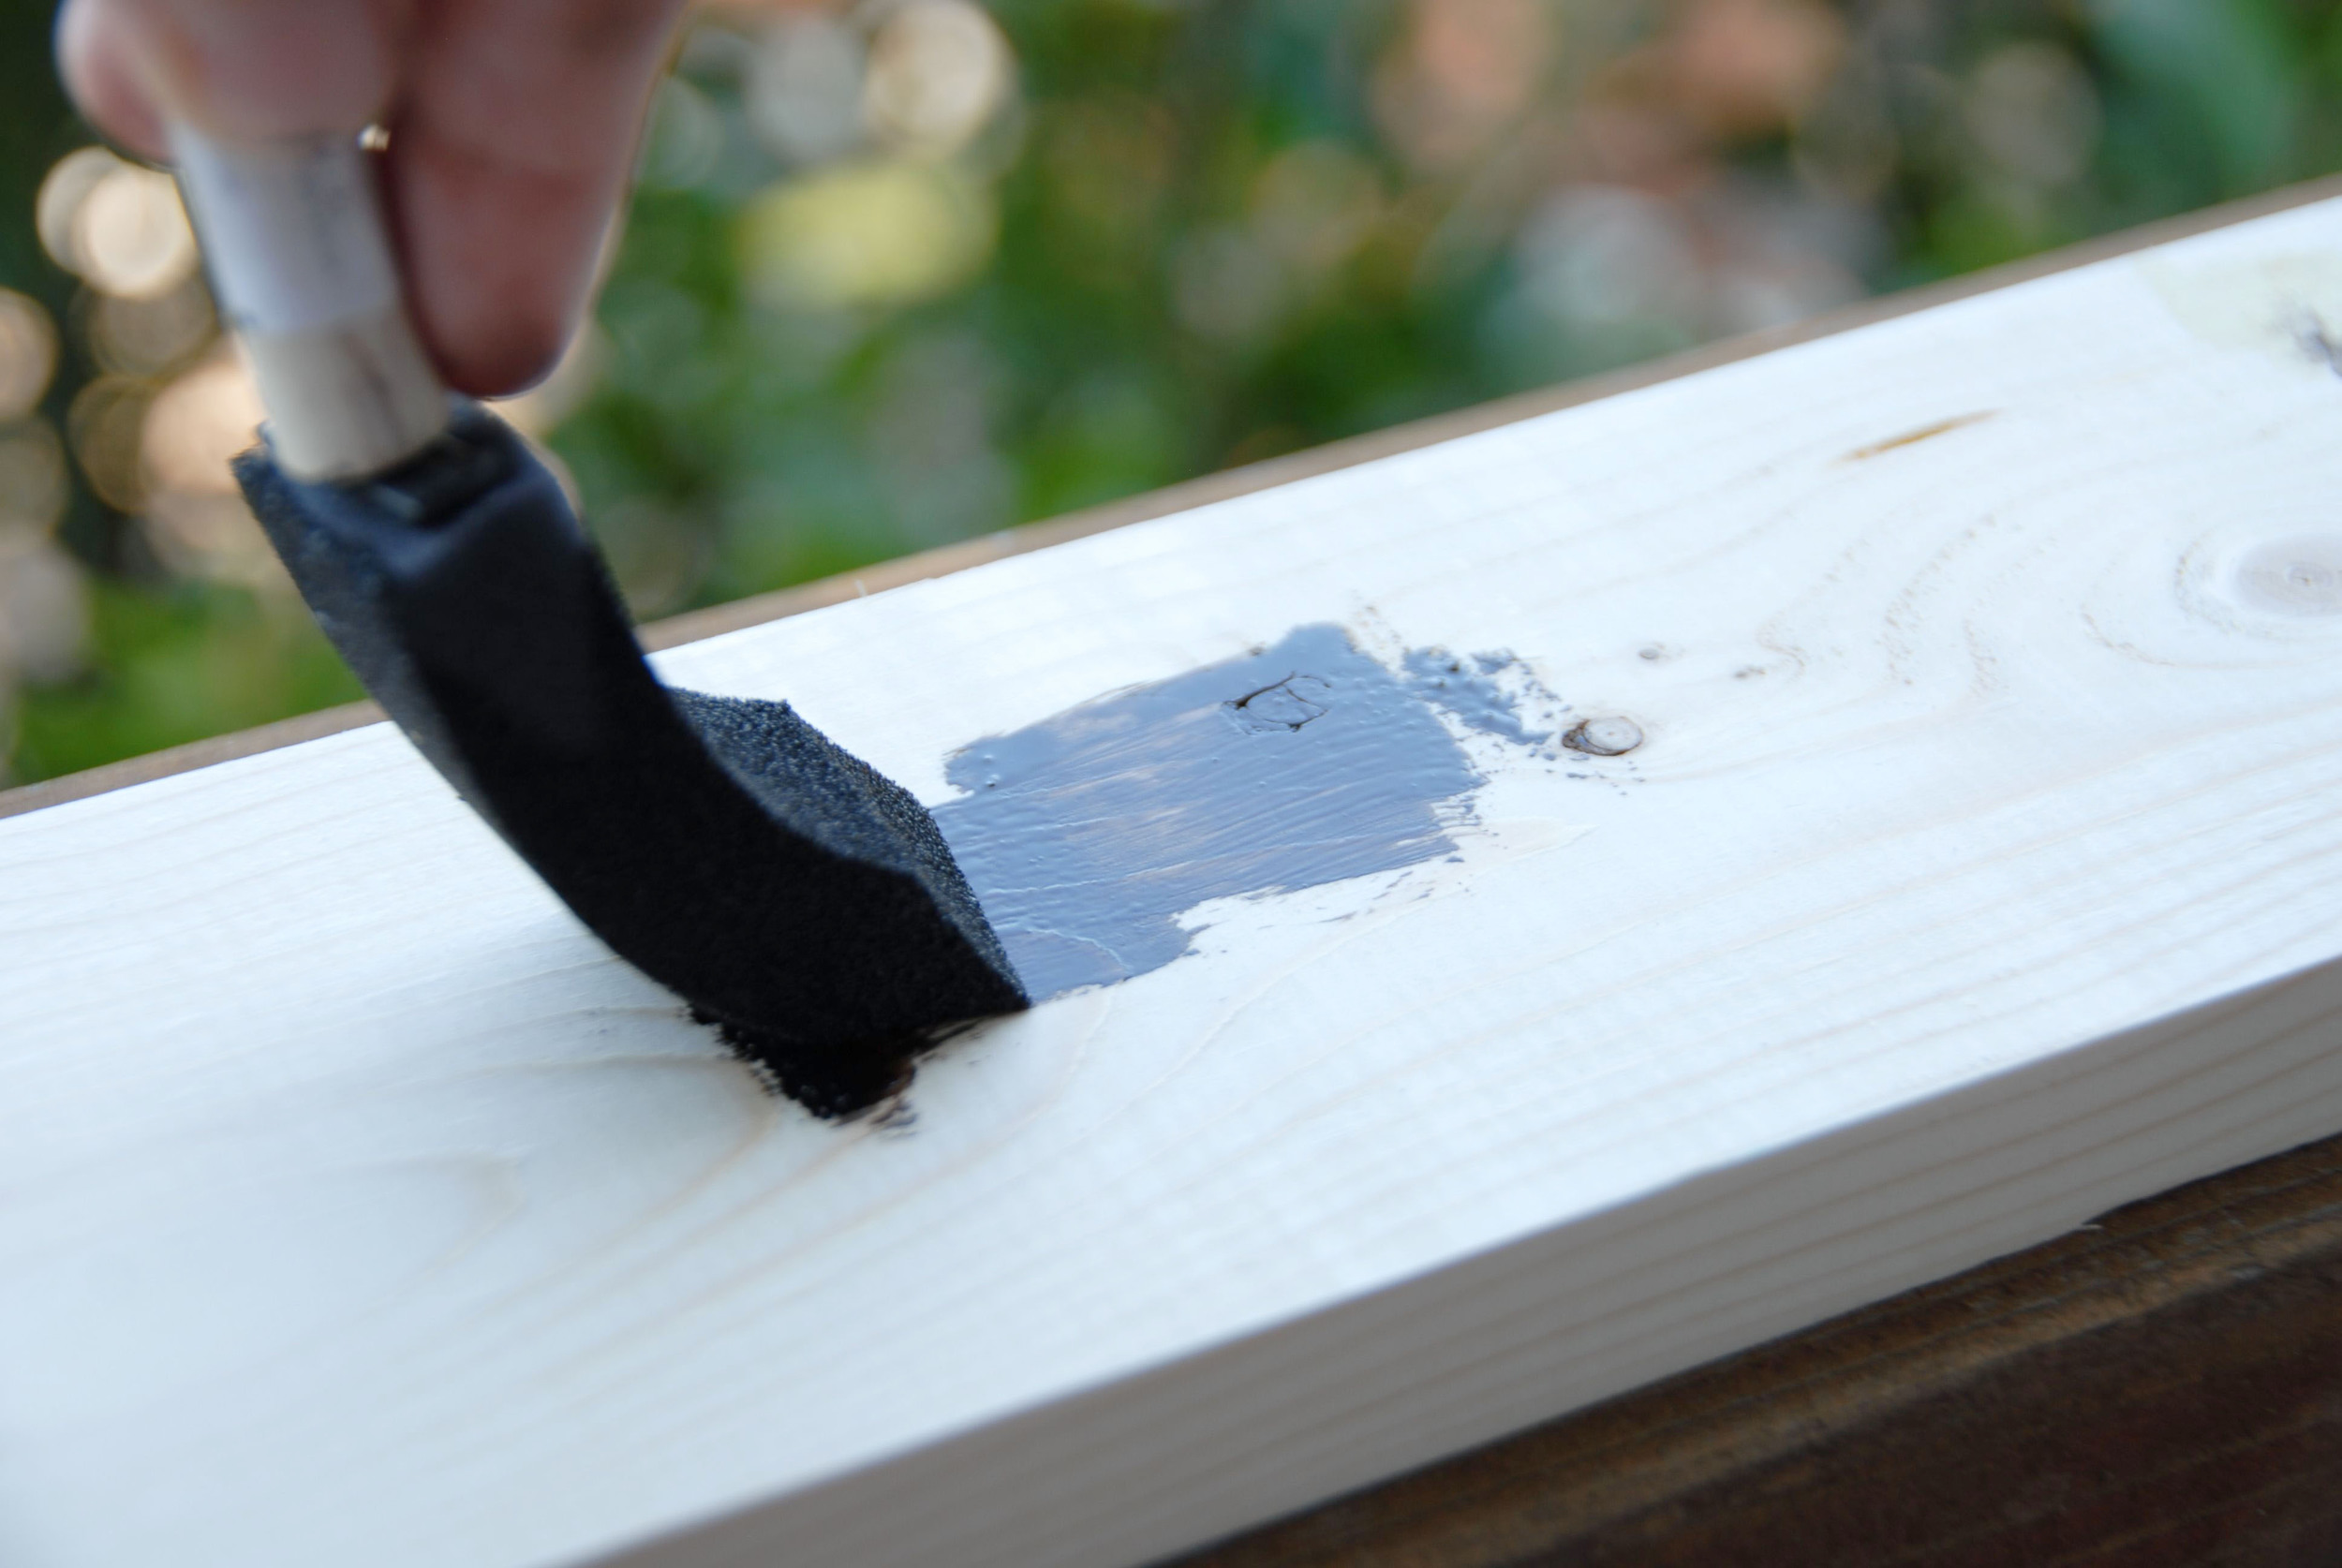
Apply a thin coat of stain, going with the grain, to the boards.
Step 6:
Using a wider sponge, wipe the board from edge to edge (doing this will even out the stain). Note: Do this immediately. If you let the stain sit it will get tacky.
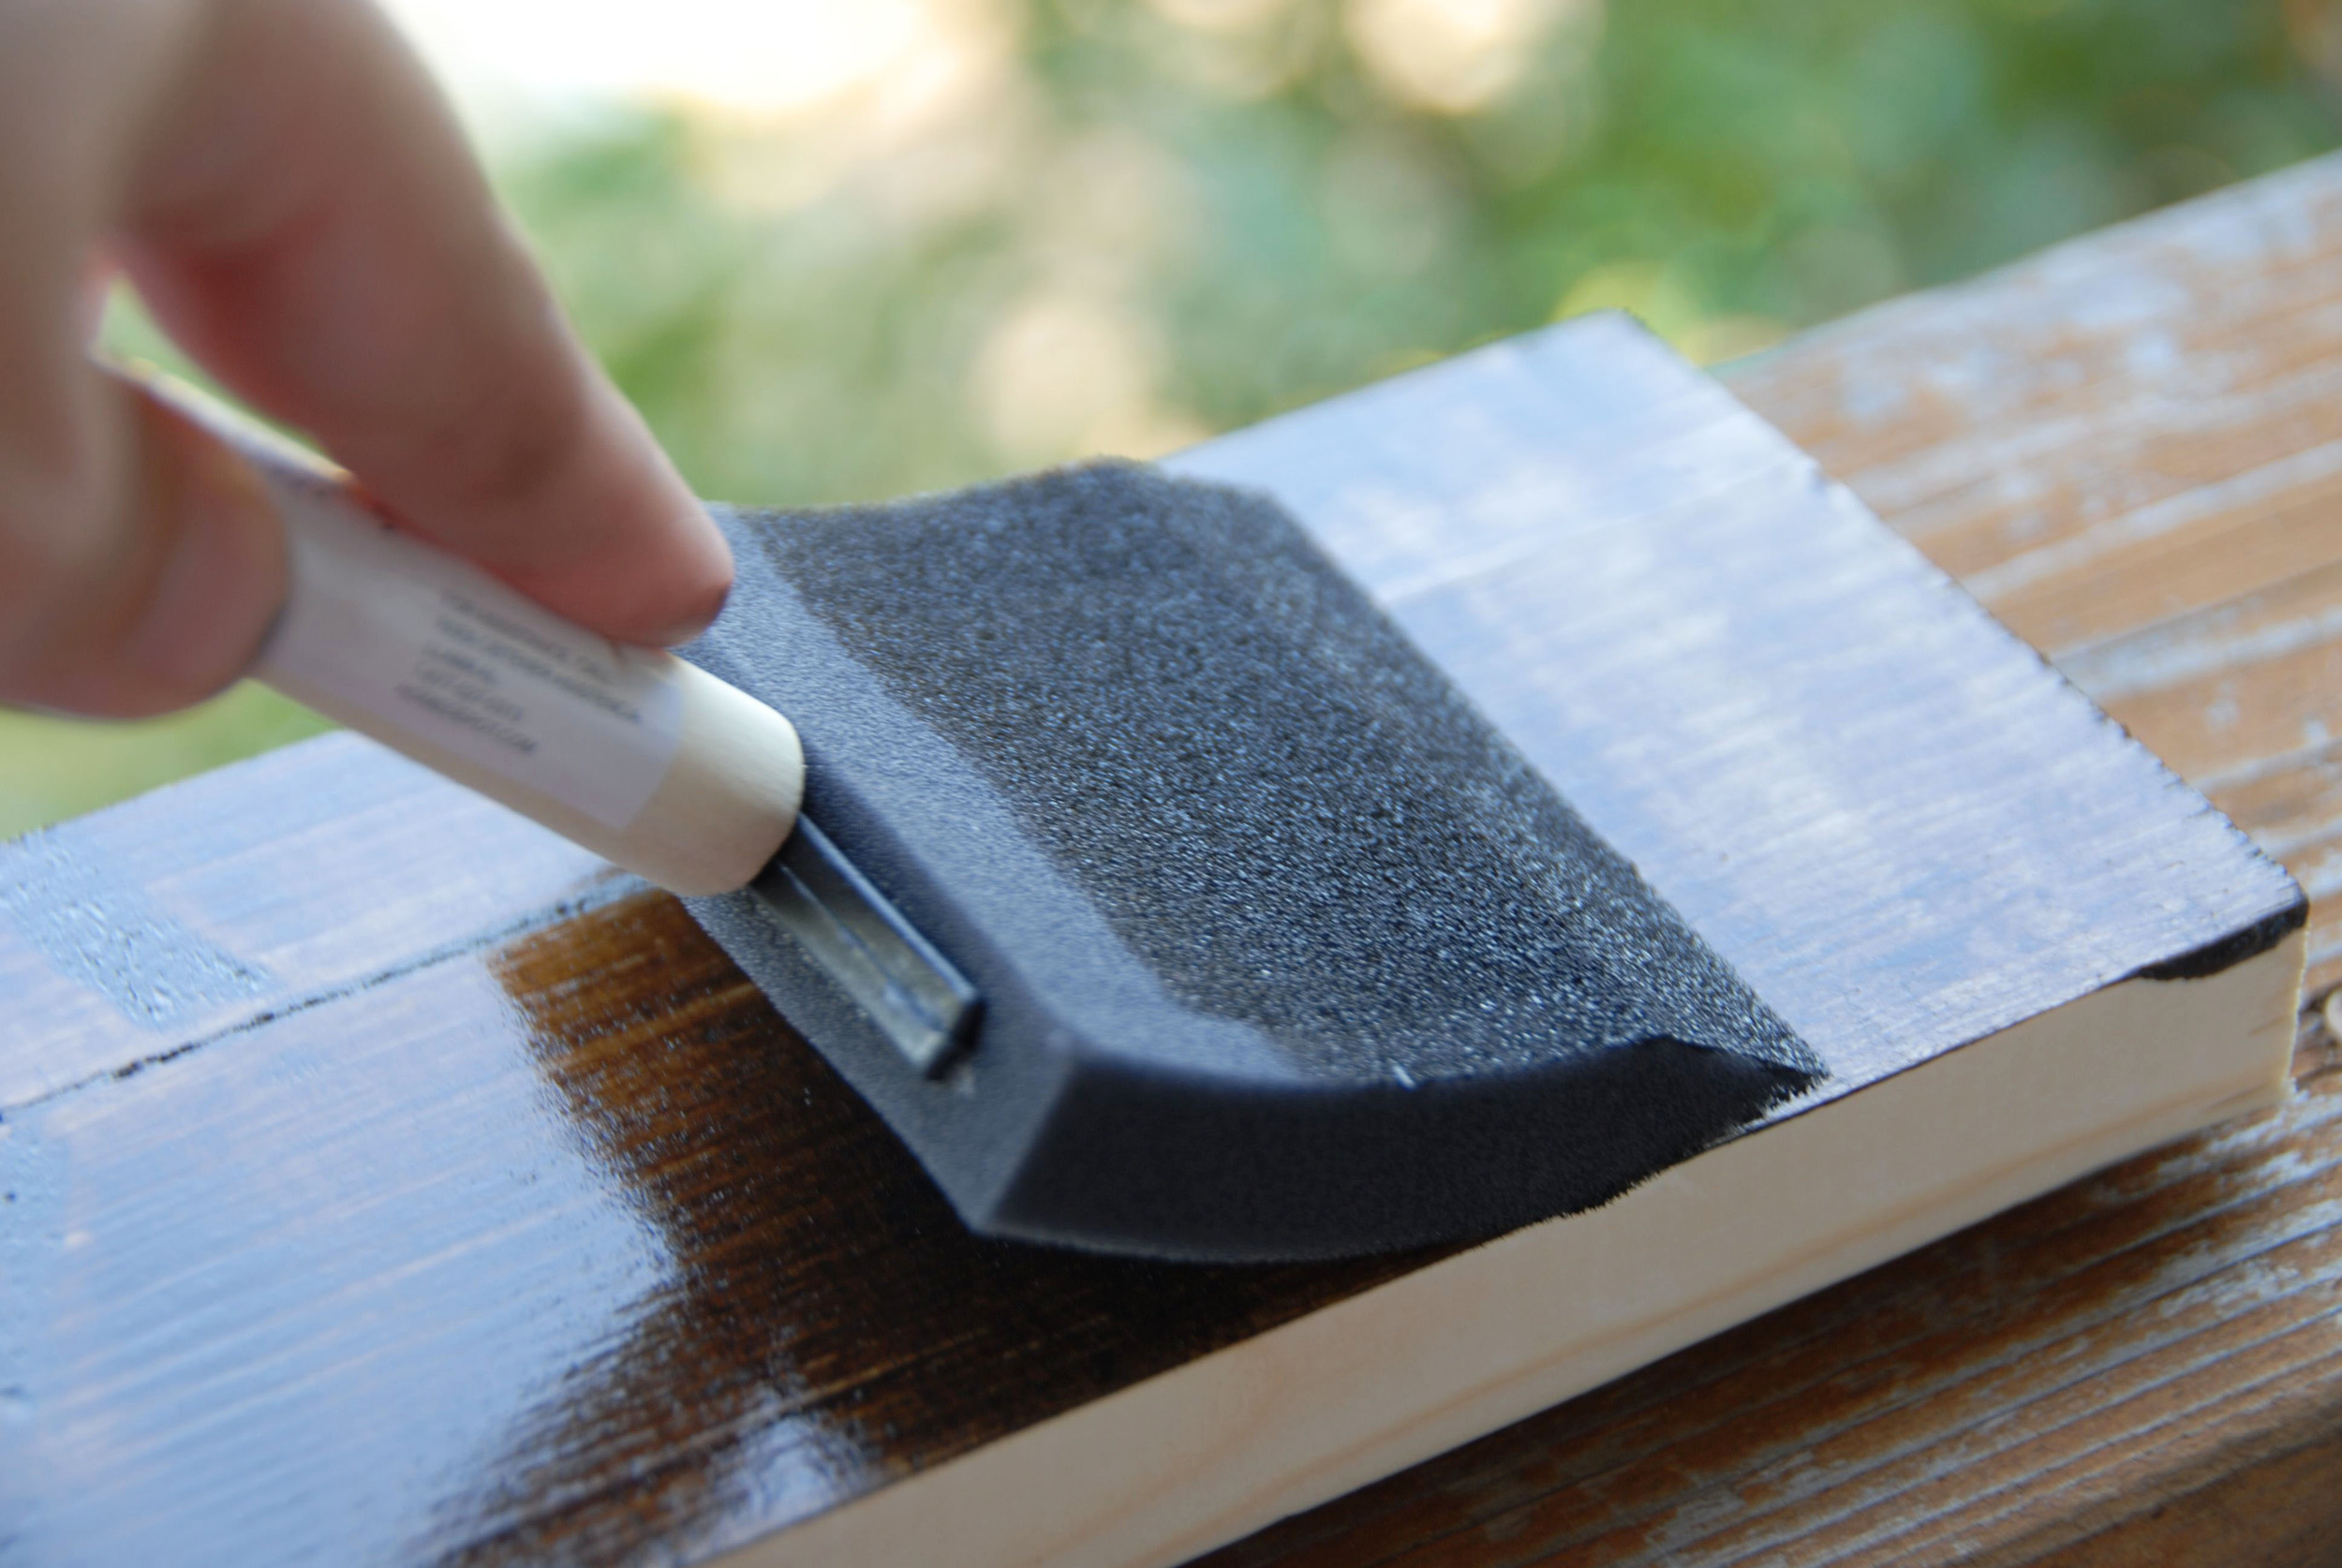
Using a wider sponge, wipe the board from edge to edge (doing this will even out the stain). Note: Do this immediately. If you let the stain sit it will get tacky.
Step 7:
The stain needs to sit for approximately six hours before applying the second coat. If you are like me and want to get as much done as quickly as possible, grab the board by the edges and while holding it, stain the other side of the board.
Holding the board on the unstained edges will allow you to stain both sides at on time.
Step 8:
Stain the exposed edge of the board.
Stain the exposed edge of the board.
Step 9:
Allow the boards to sit for at least six hours. Trust me on this! I tried a second coat after 4 hours and it turned out terrible!

The boards after one thin coat.
Step 10:
After the boards have dried, apply the second (and final) coat. Note: At this point, stain the other exposed edge and ends of the boards.
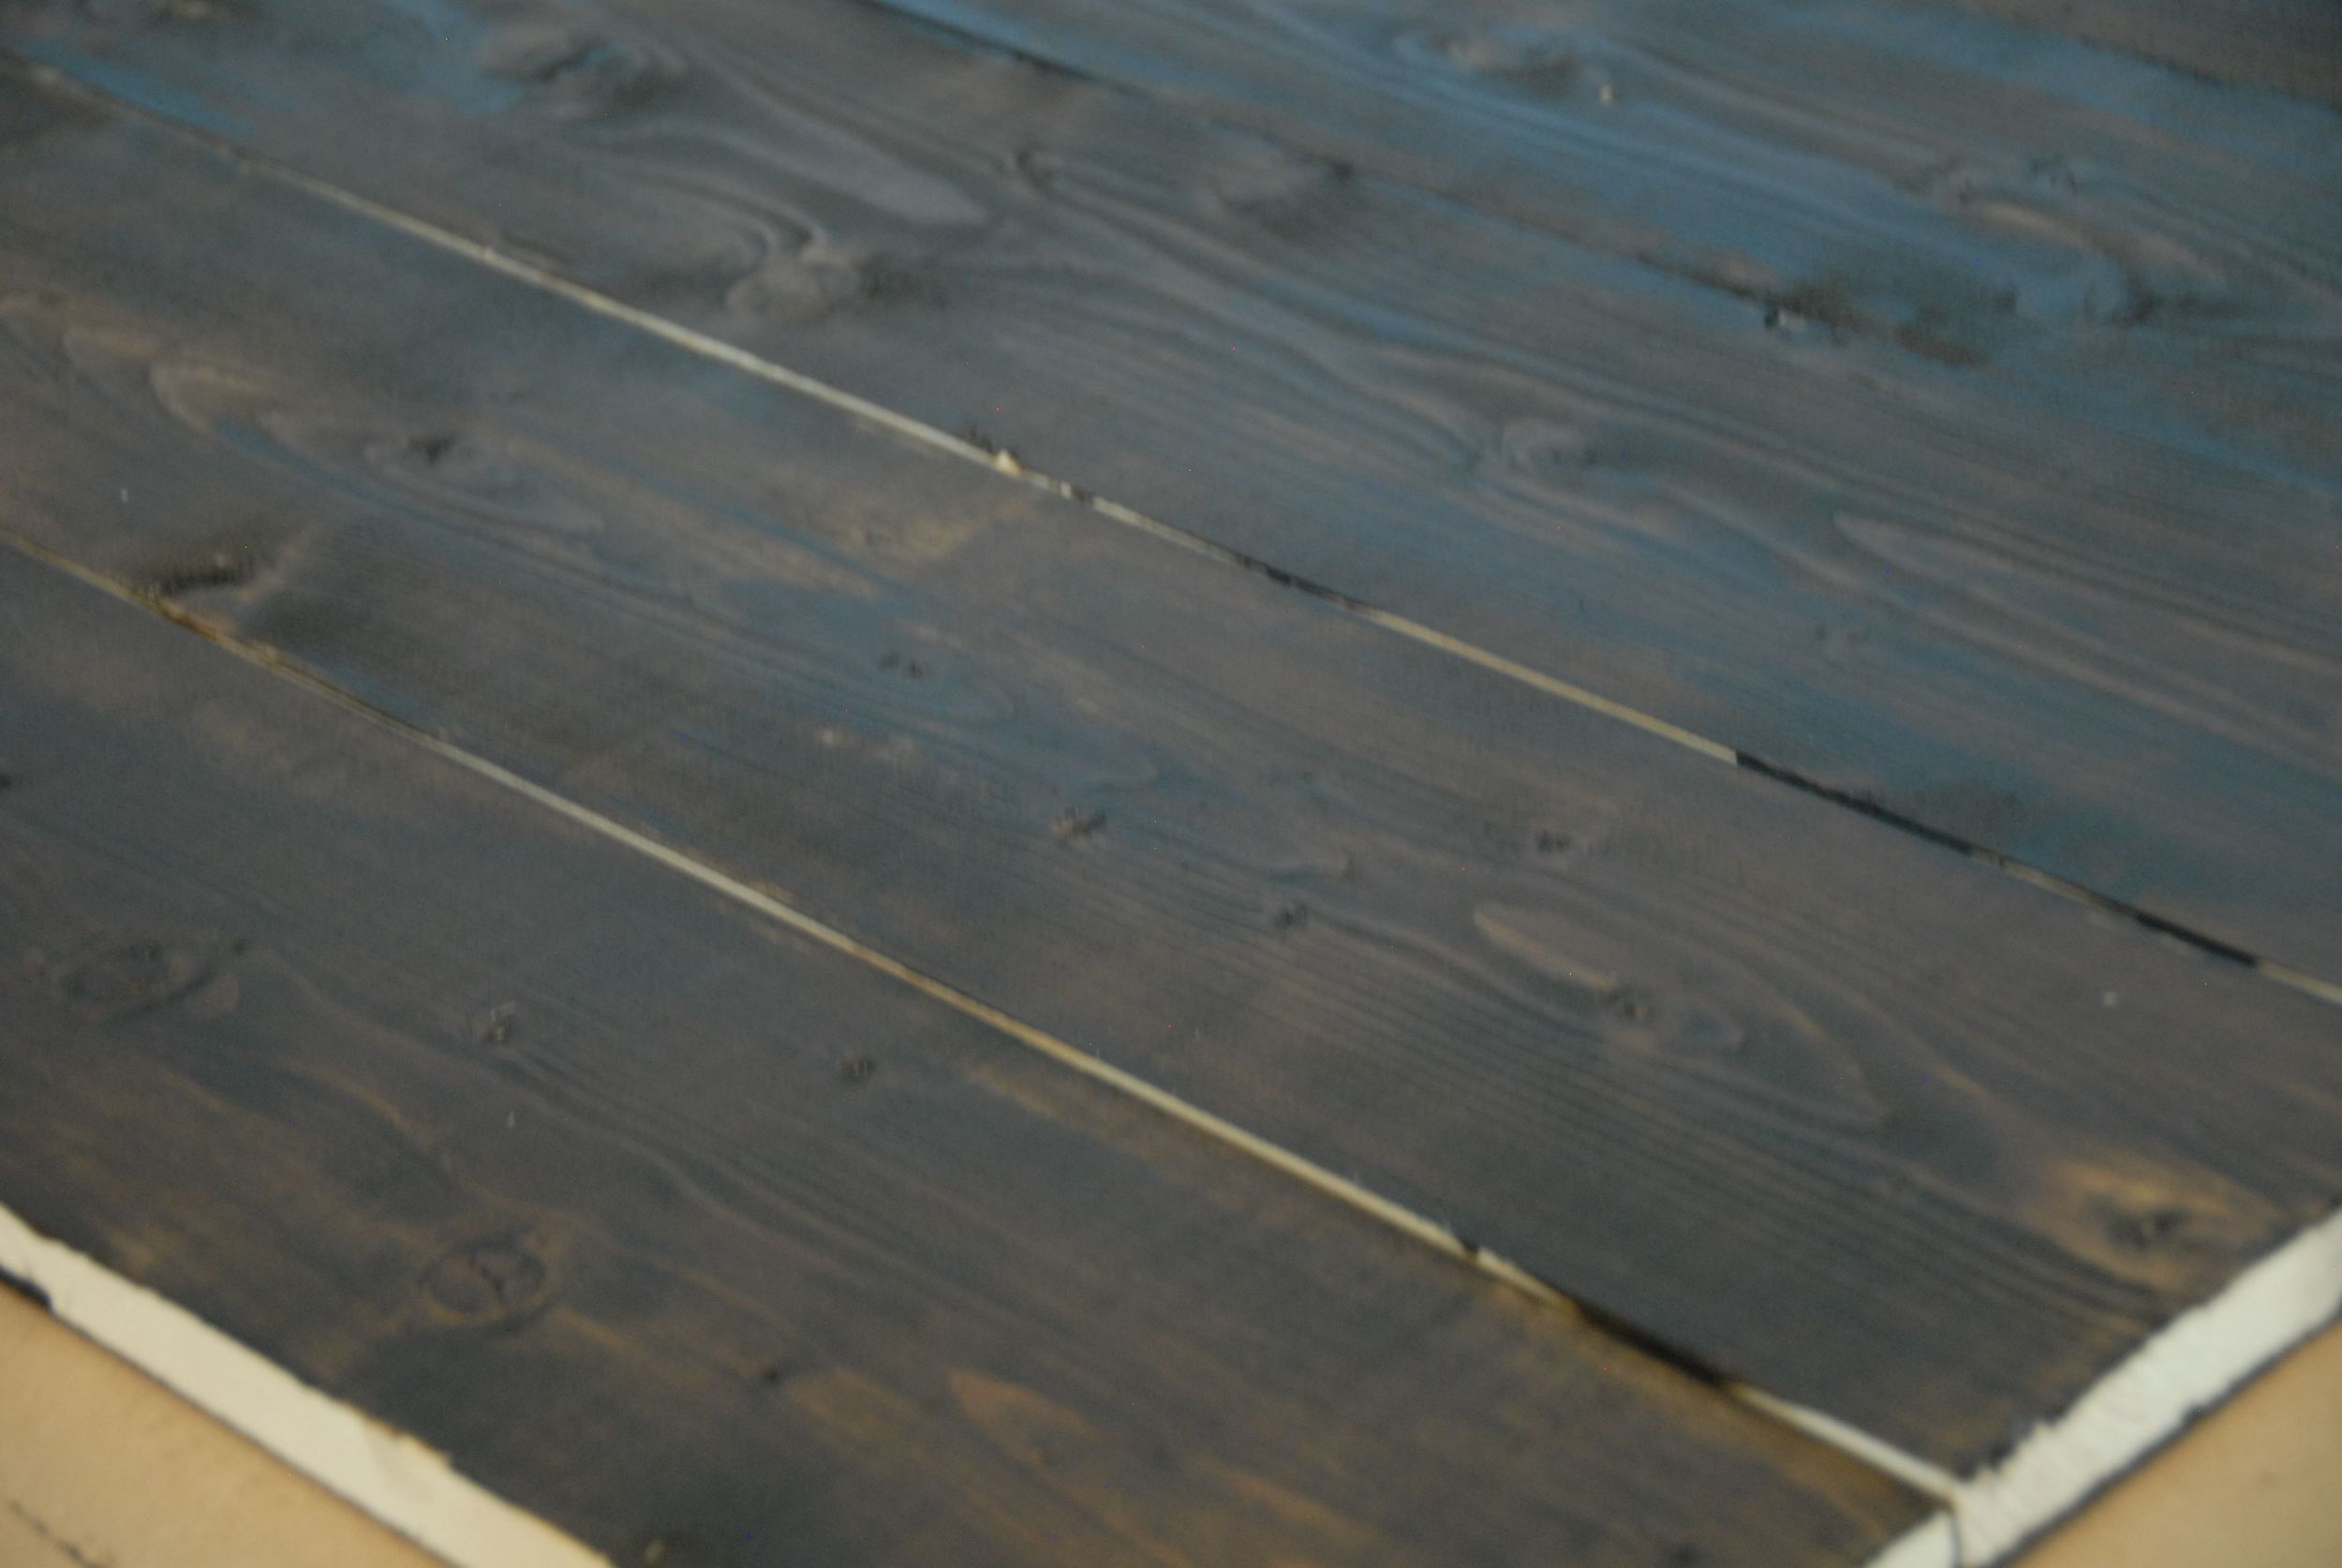
The boards after the final coat (before staining the ends)
Step 11:
Place the 1" X 6" board center behind the left bed rail and mark a hole for drilling. Note: Mark a hole at the highest and lowest slat. Repeat on the right side.
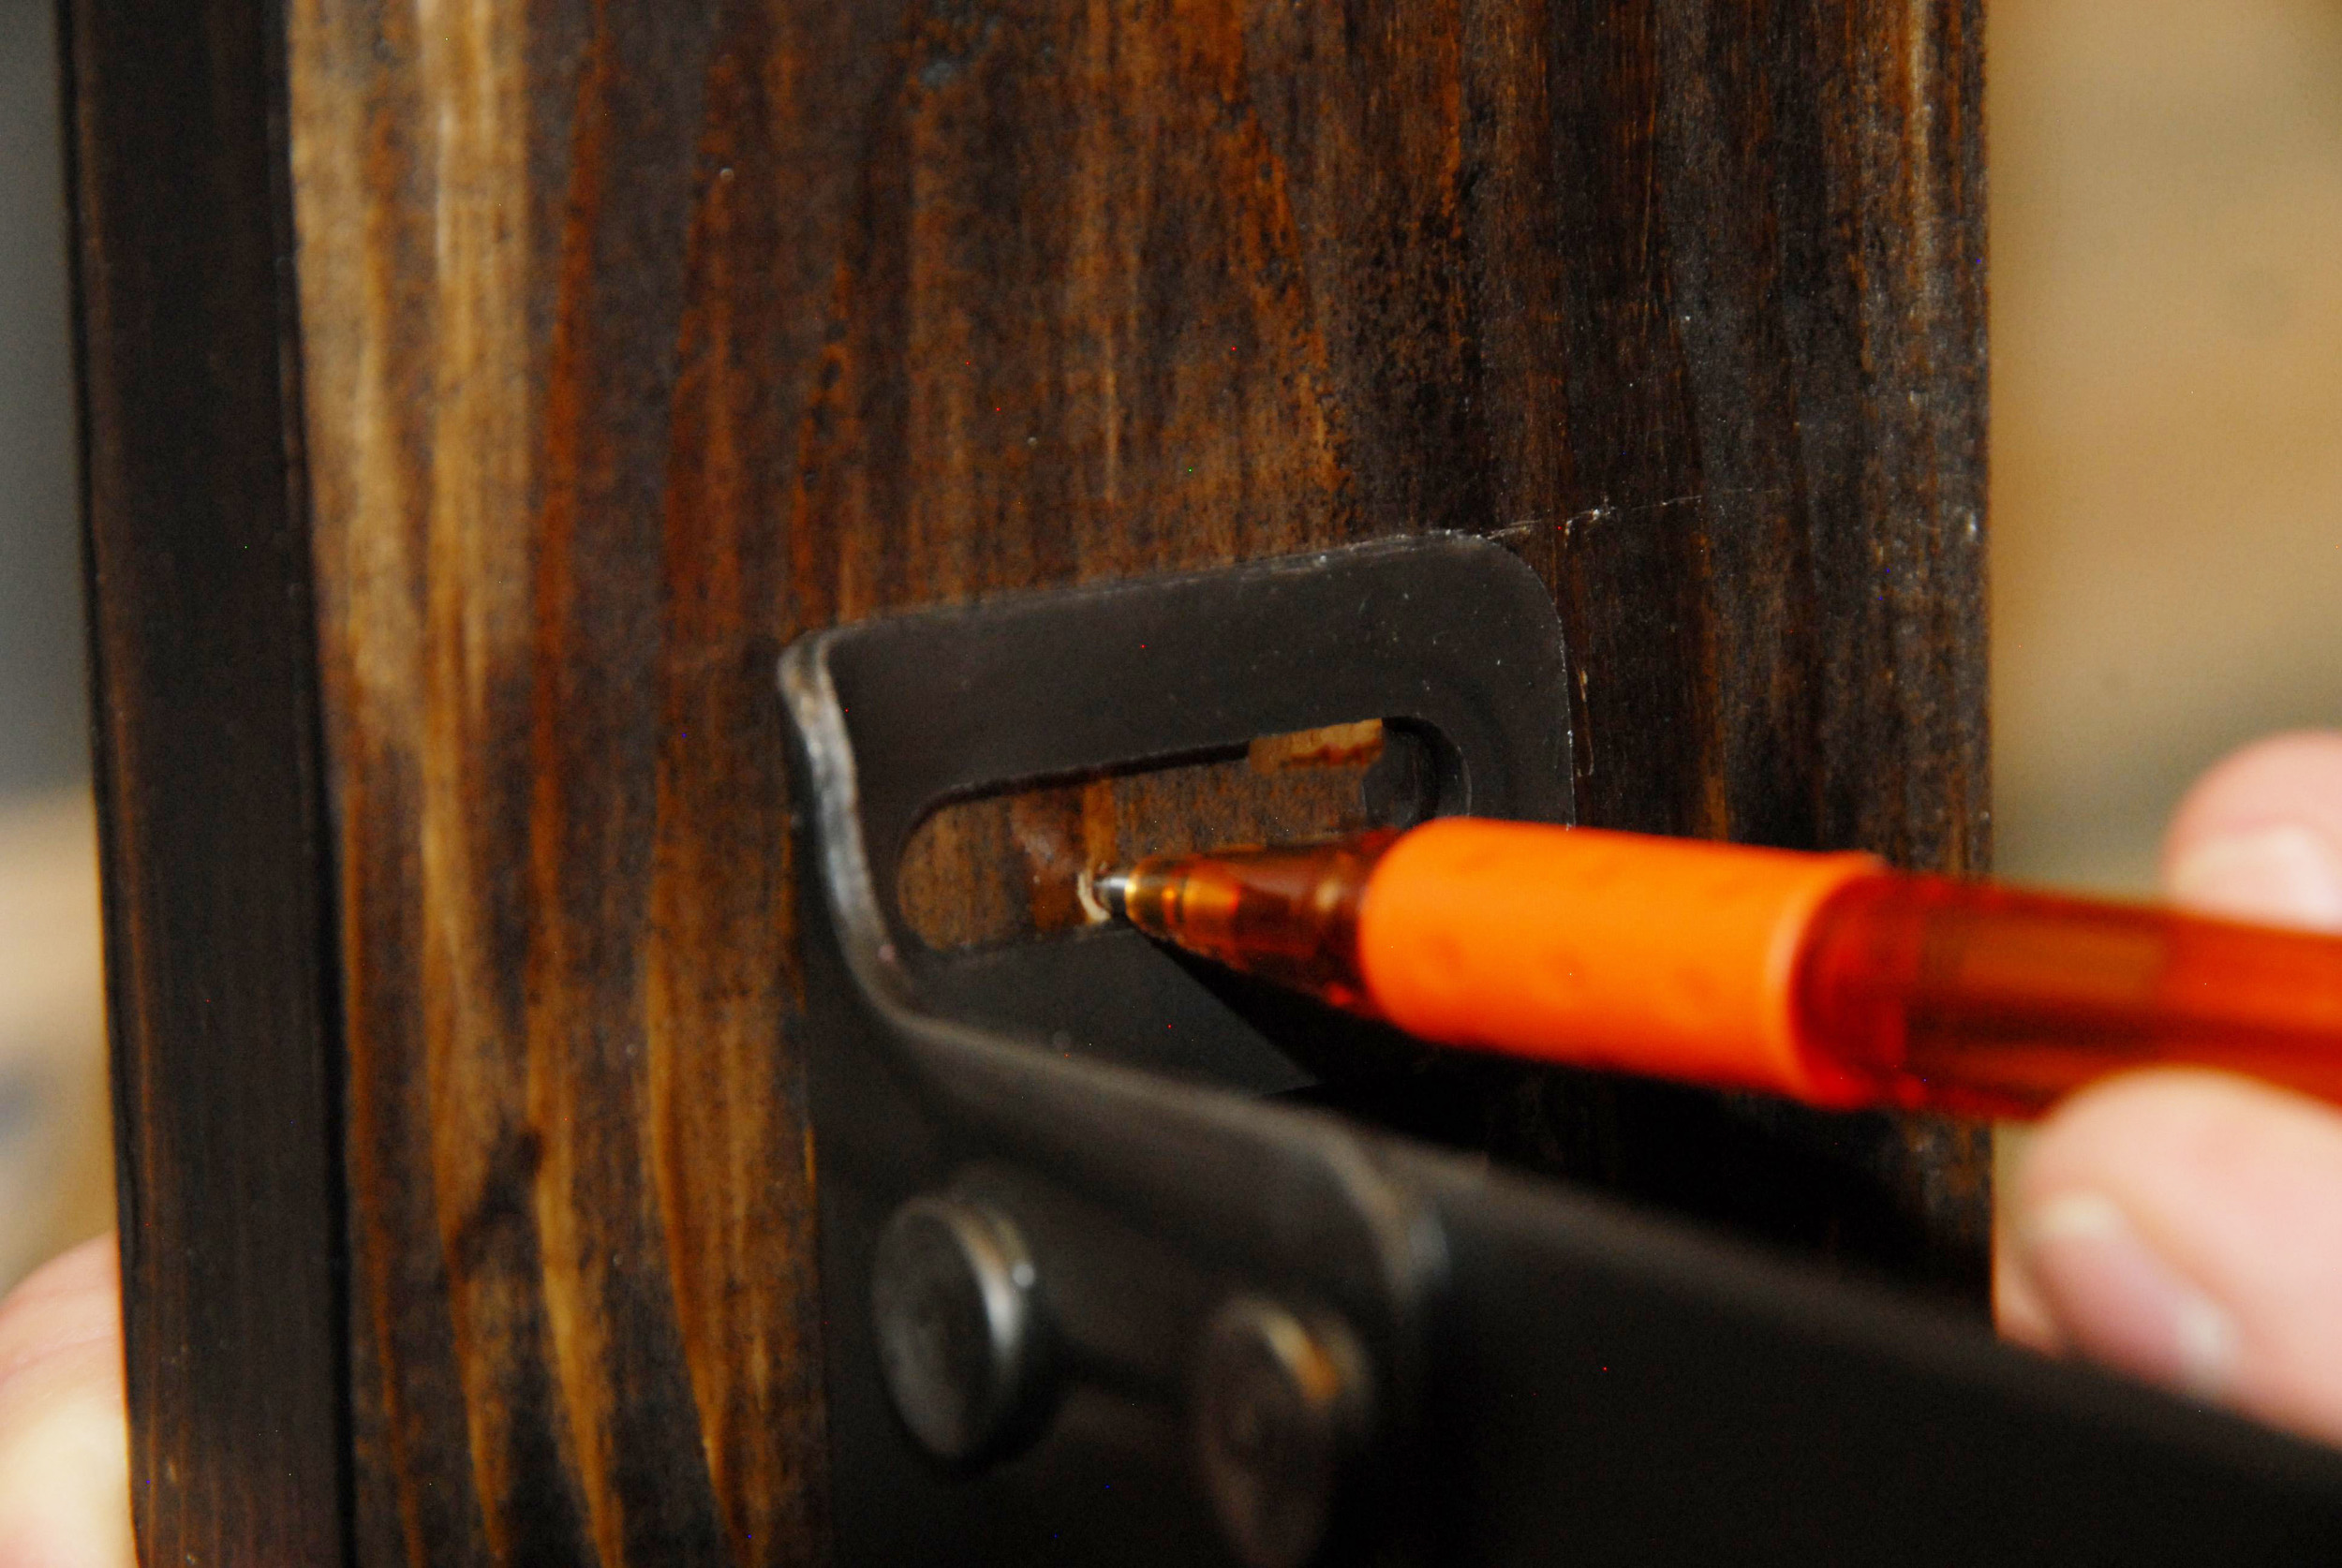
Place the 1" X 6" board center behind the left bed rail and mark a hole for drilling. Note: Mark a hole at the highest and lowest slat.Repeat on the right side.
Step 12:
Using a 1/4 inch drill bit, drill at the marked spots on the 1" X 6"s.
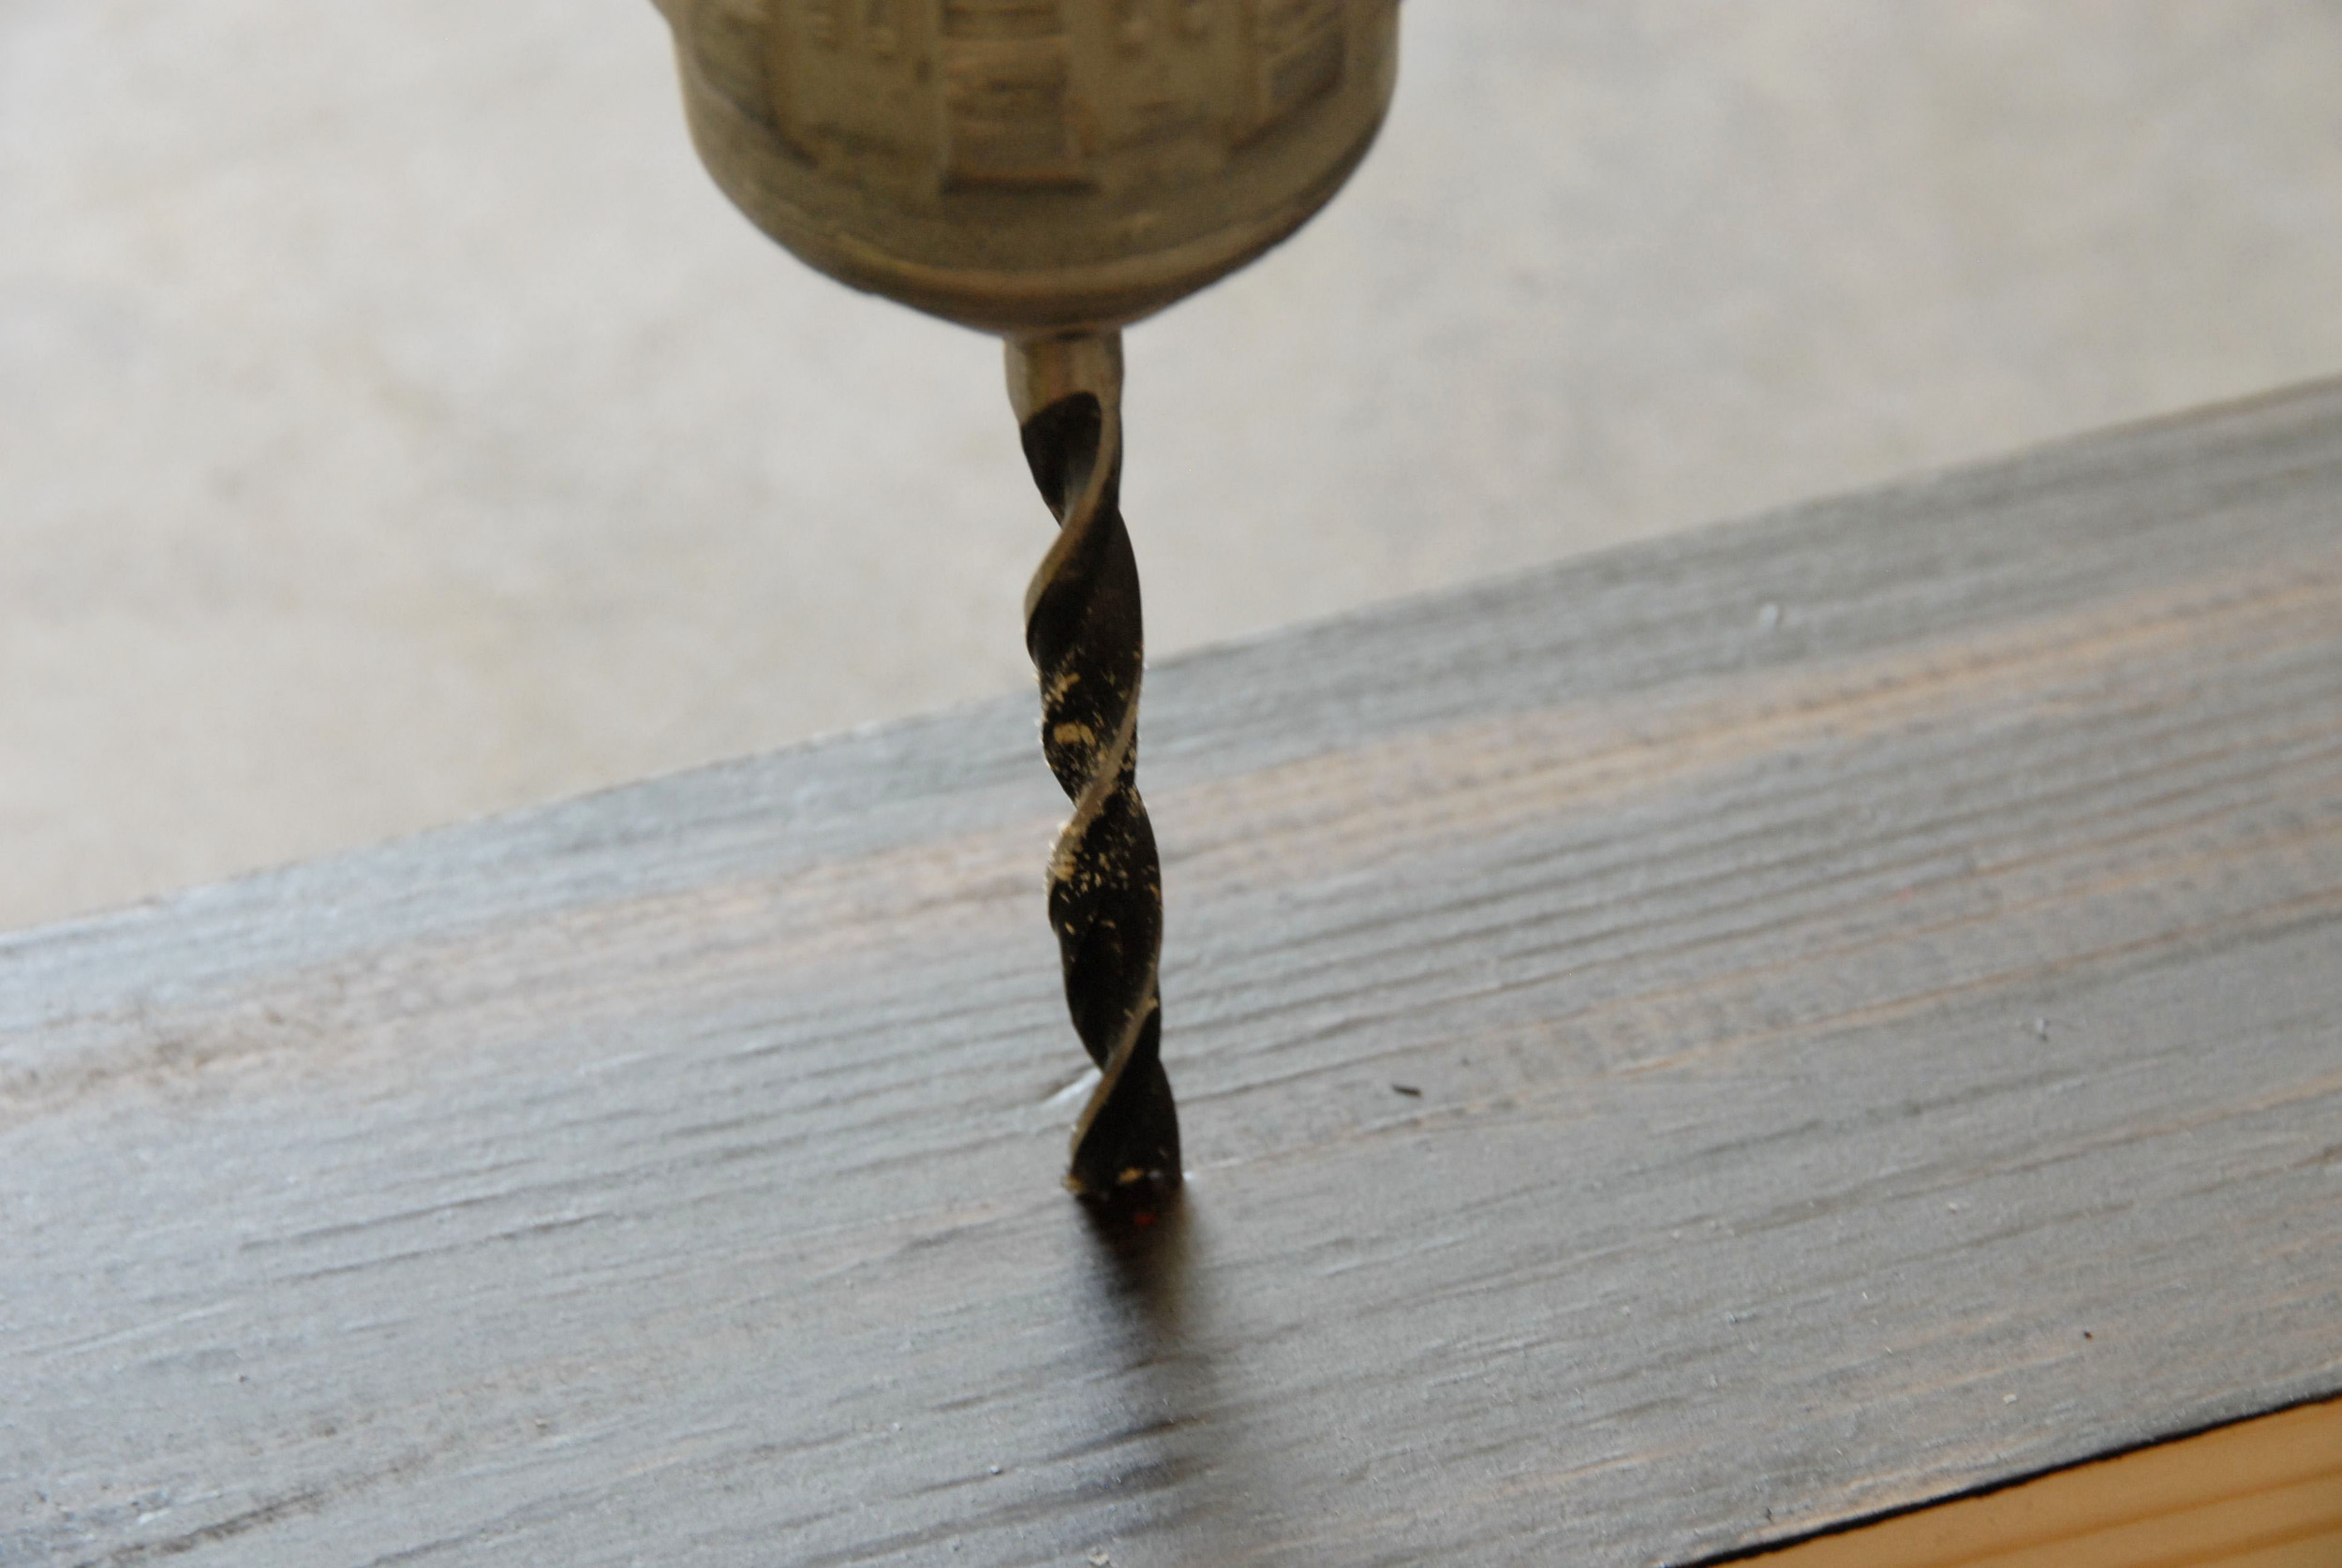
Using a 1/4 inch drill bit, drill at the marked spots on the 1" X 6"s.
Step 13:
Measure 21.75 inches from the bottom of the 1" X 6" and place a mark. This is where the bottom of the first board needs to line-up.
Step 14:
Line up all five boards so that they are stacked one on top of the other, front side down.
Step 15:
Place the 1" X 6"'s approximately 1.5 inches from the edge of the boards. Note: Use a t-square to ensure the 1" X 6" is straight.

Step 16:
Screw one 1 1/4 inch wood screw per slat into the 1" X 6". Repeat on the opposite side. Note: I used screws that did not require pre-drilling. If you do not use this type, you will need to drill a hole using a 3/16th drill bit.
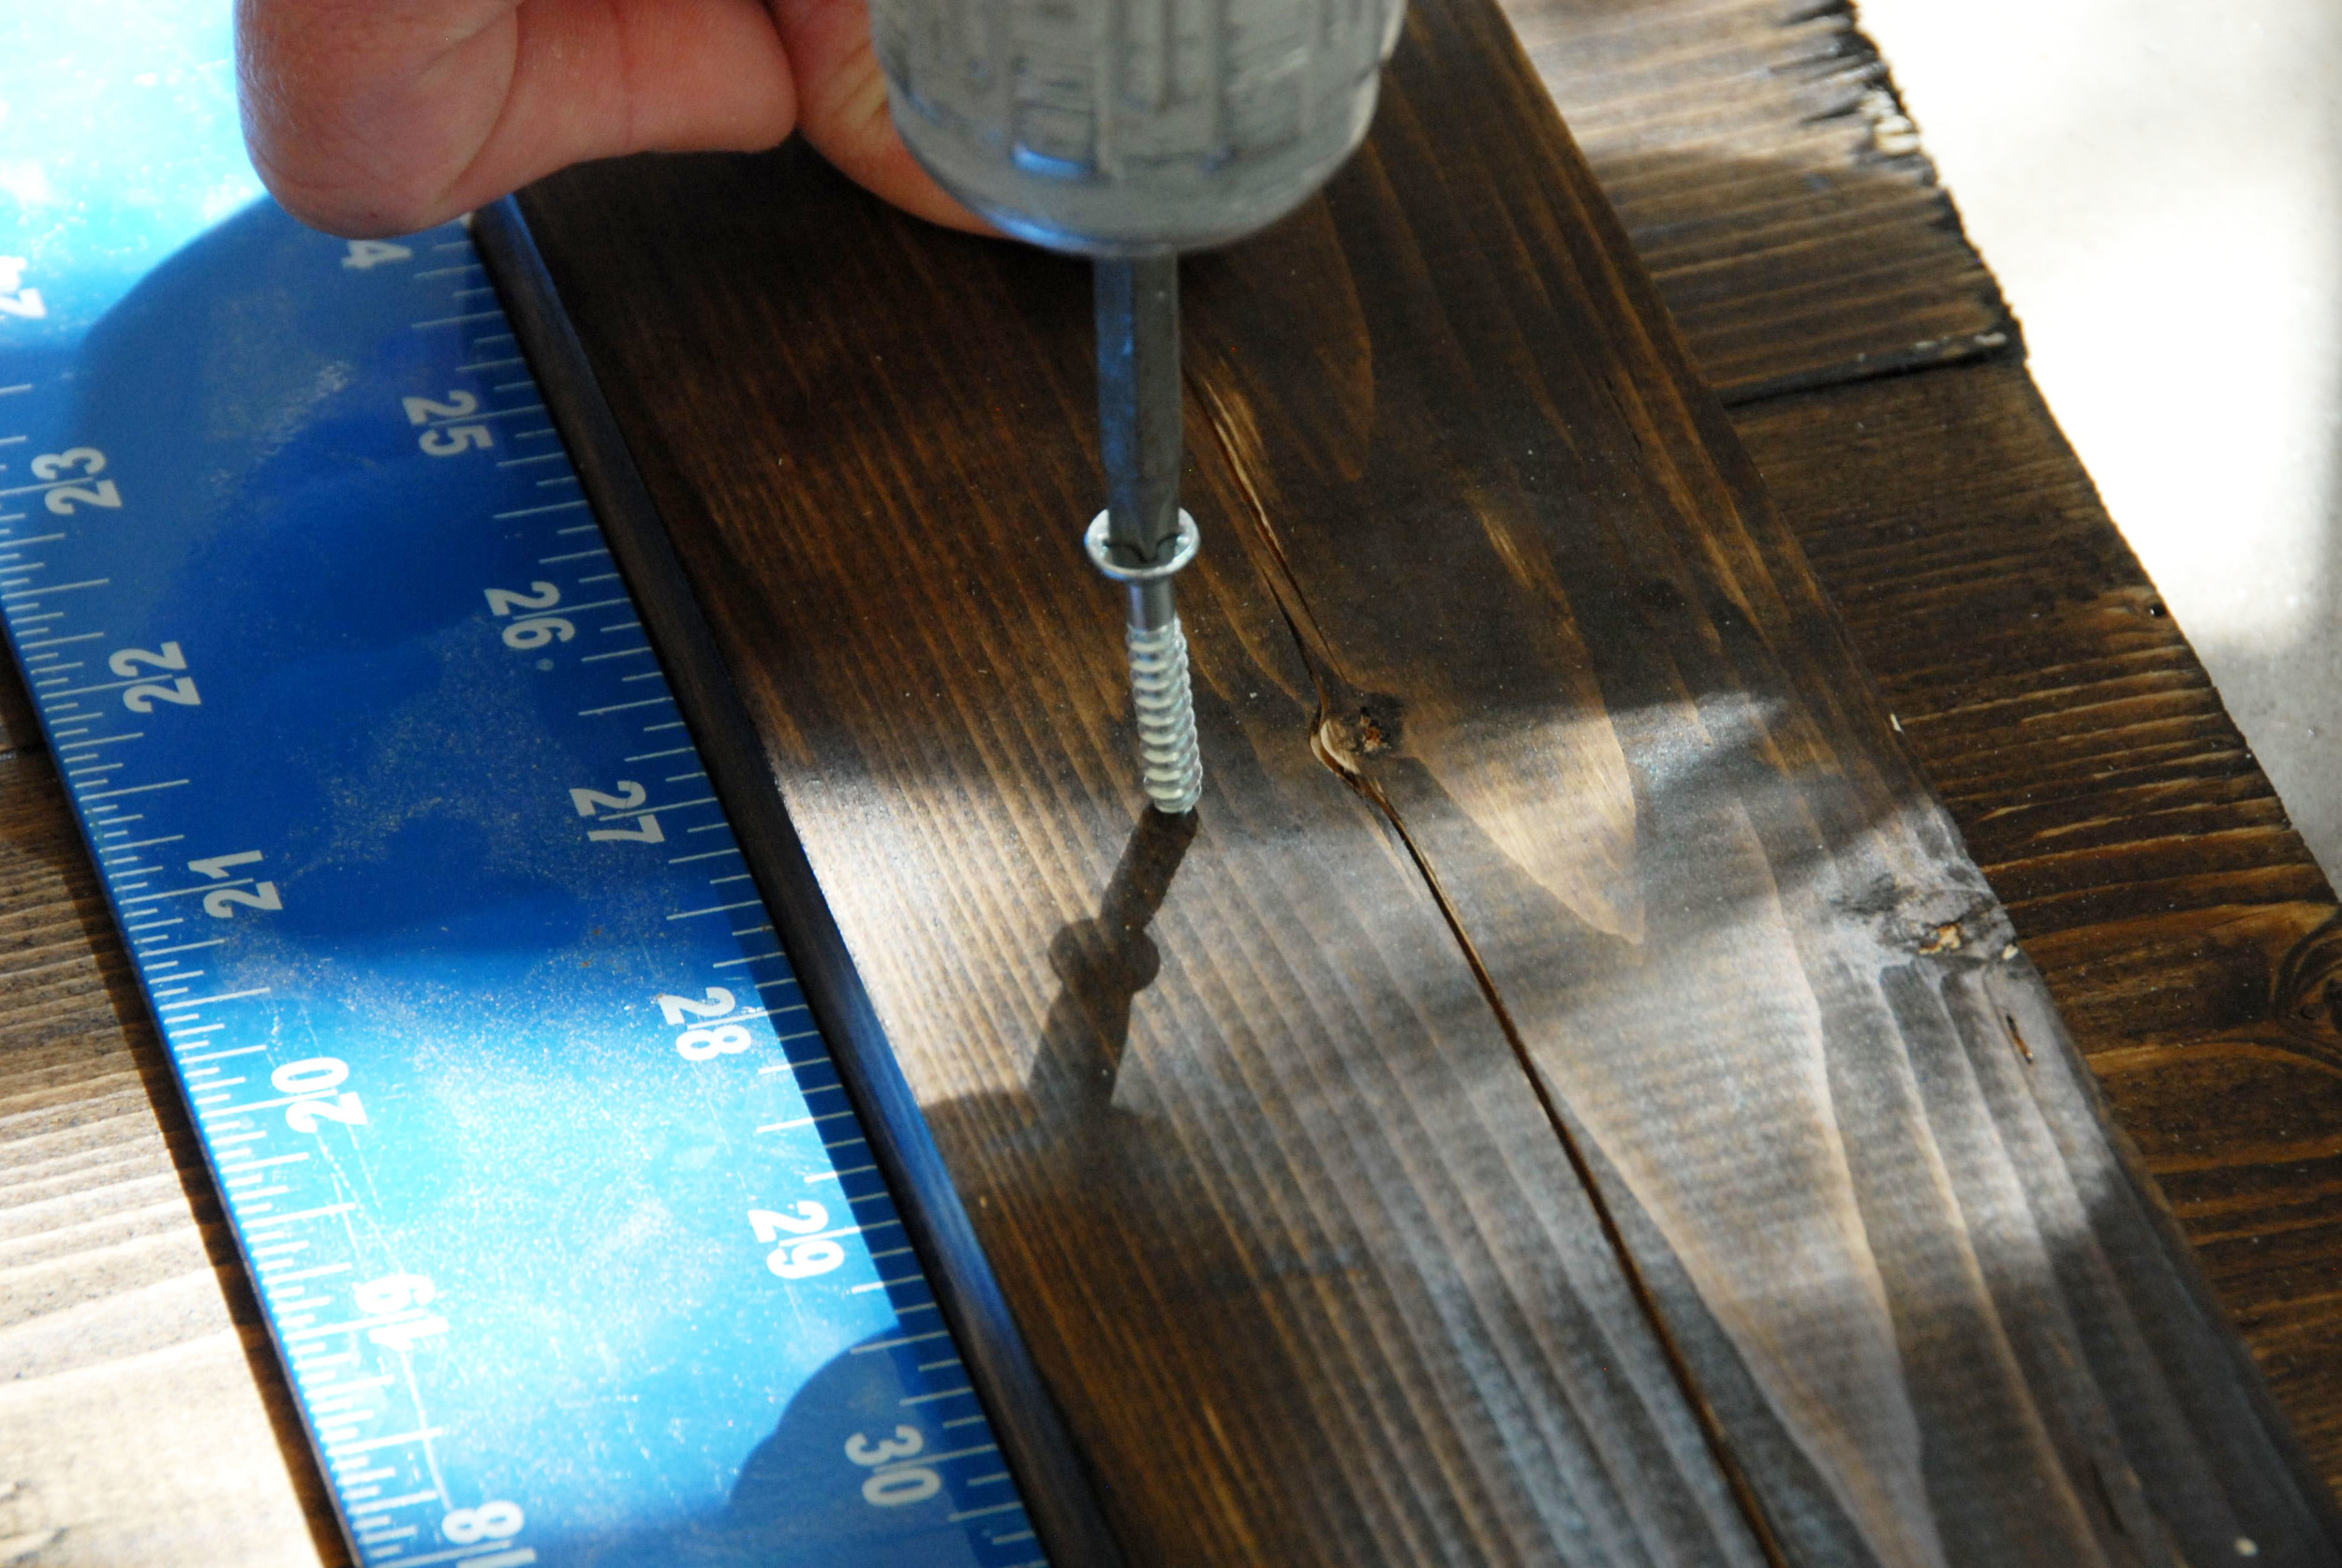
Screw one 1 1/4 inch wood screw per slat into the 1" X 6". Repeat on the opposite side.
Step 17:
Attached the headboard to the slats in the frame using carriage bolts and washers.

Attached the headboard to the slats in the frame using carriage bolts and washers.
Step 18:
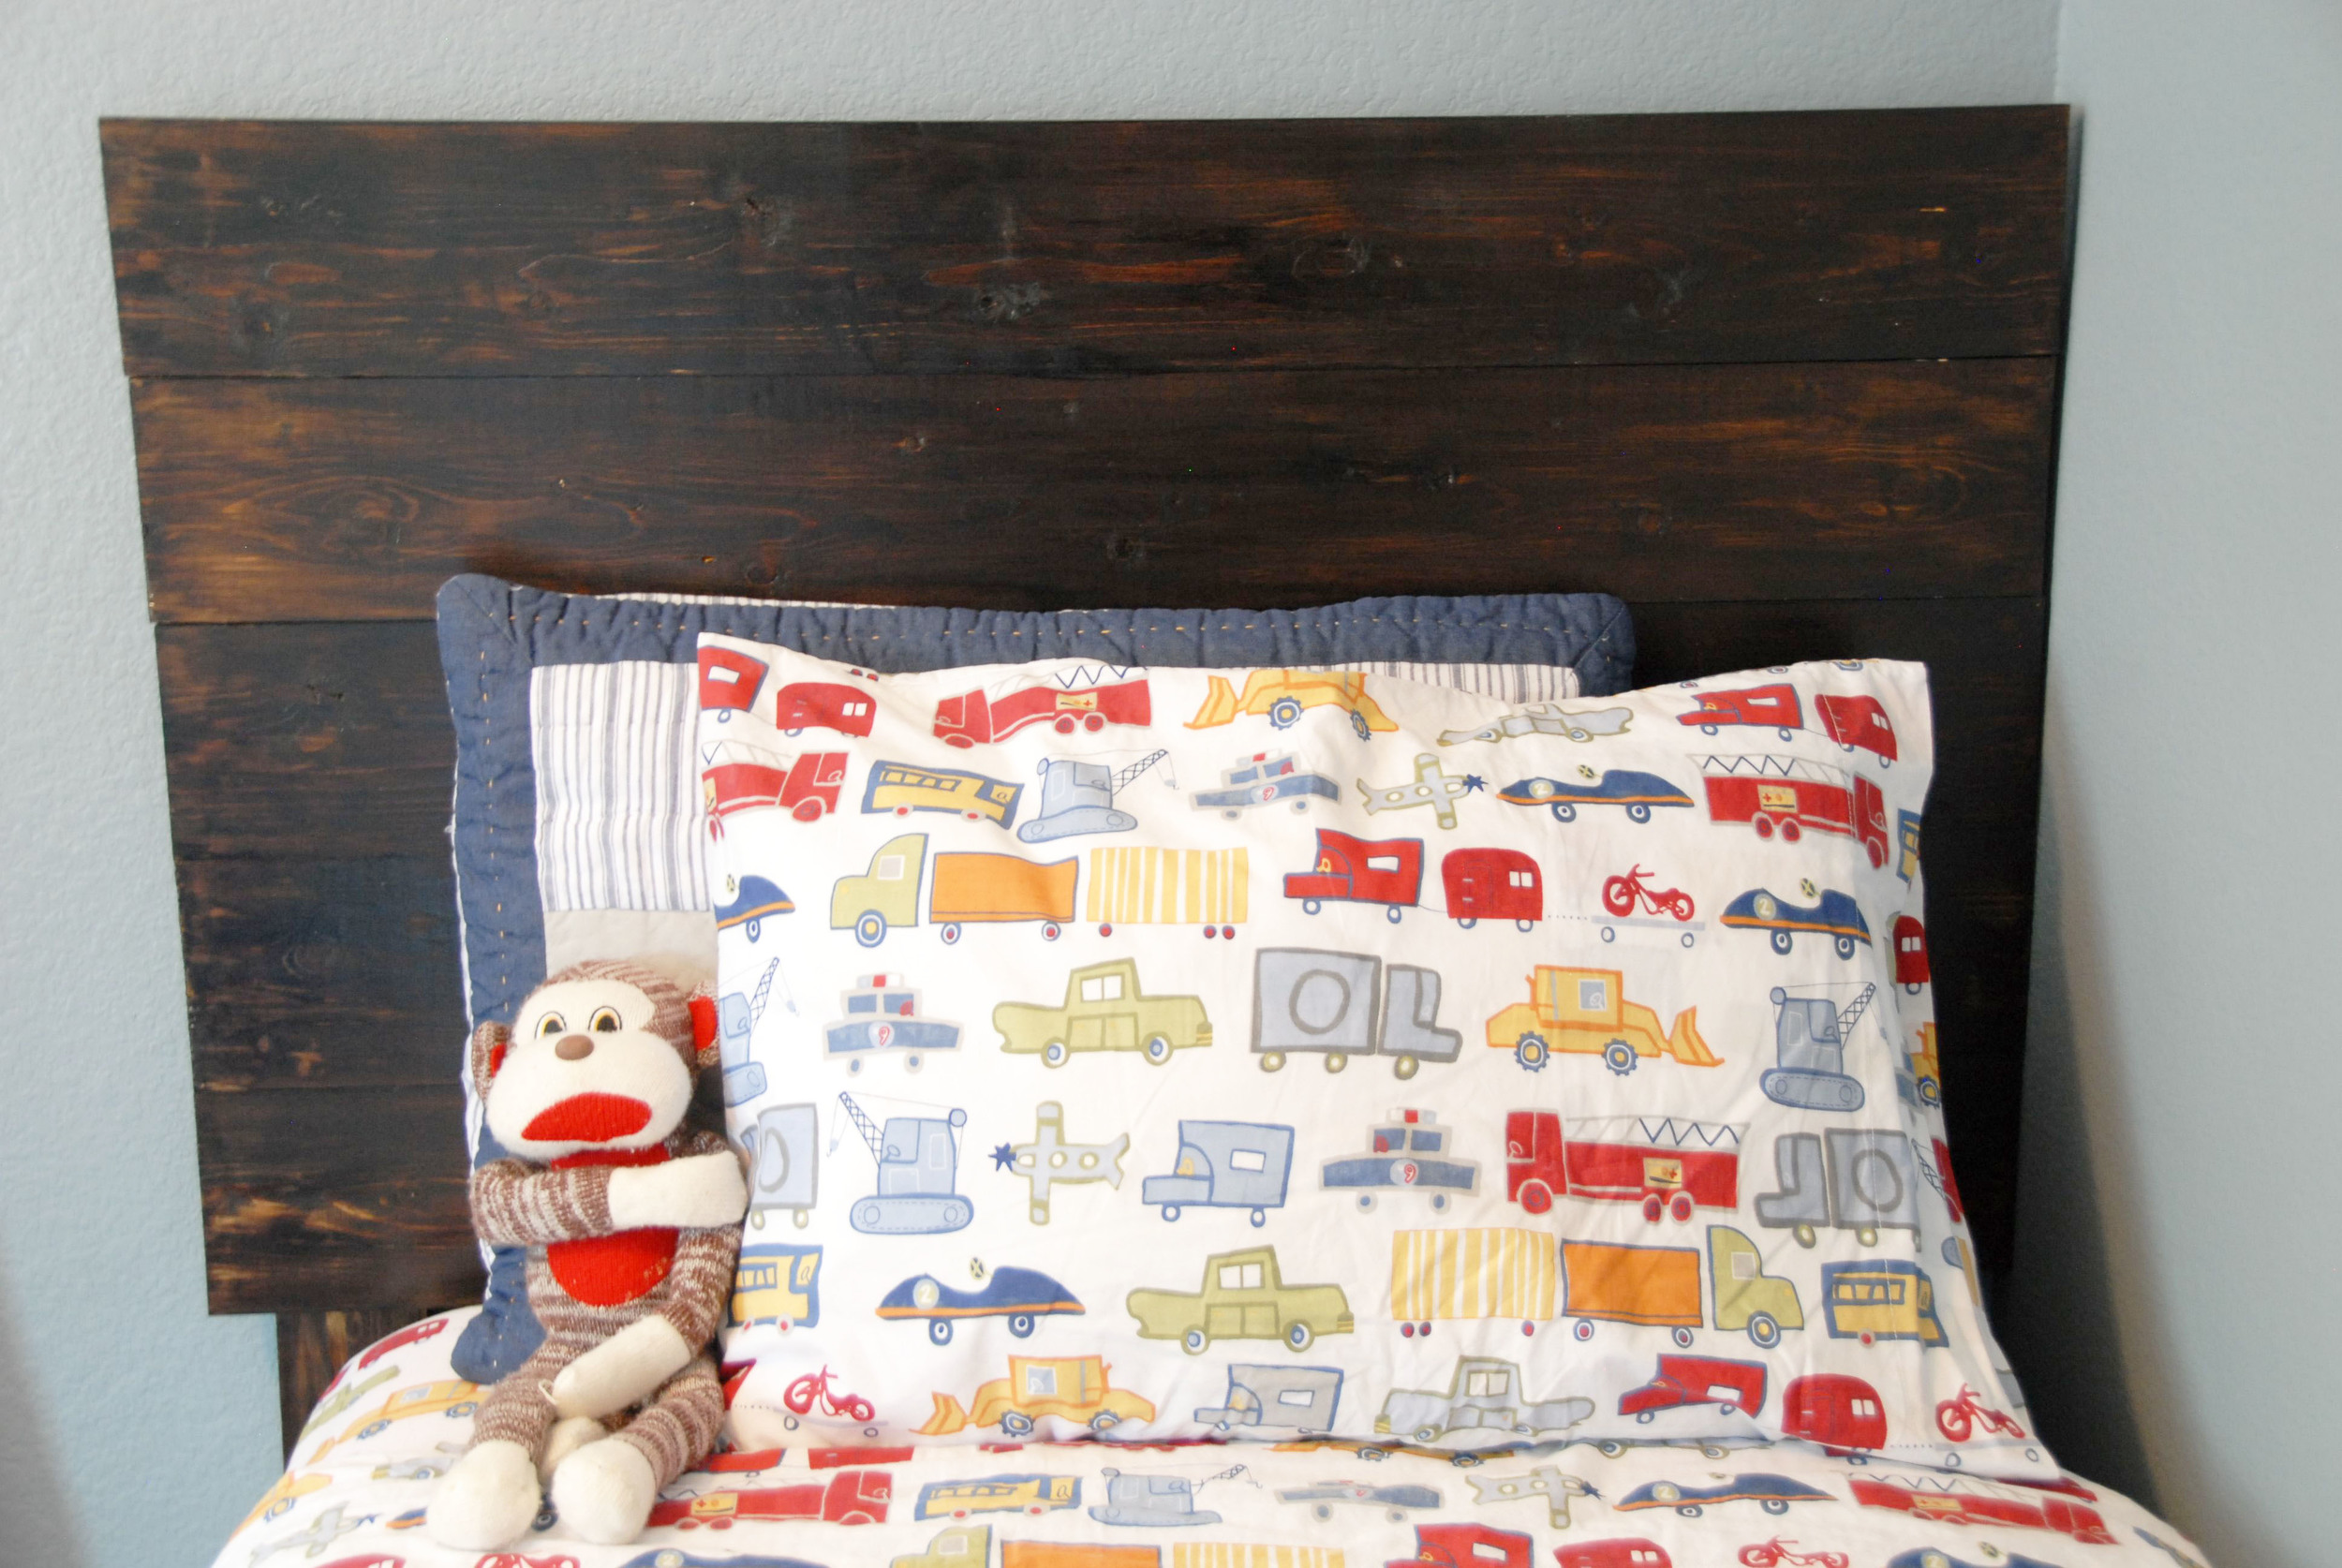
Marvel at your work!

DIY Rustic Headboard Front
DIY Rustic Headboard Front
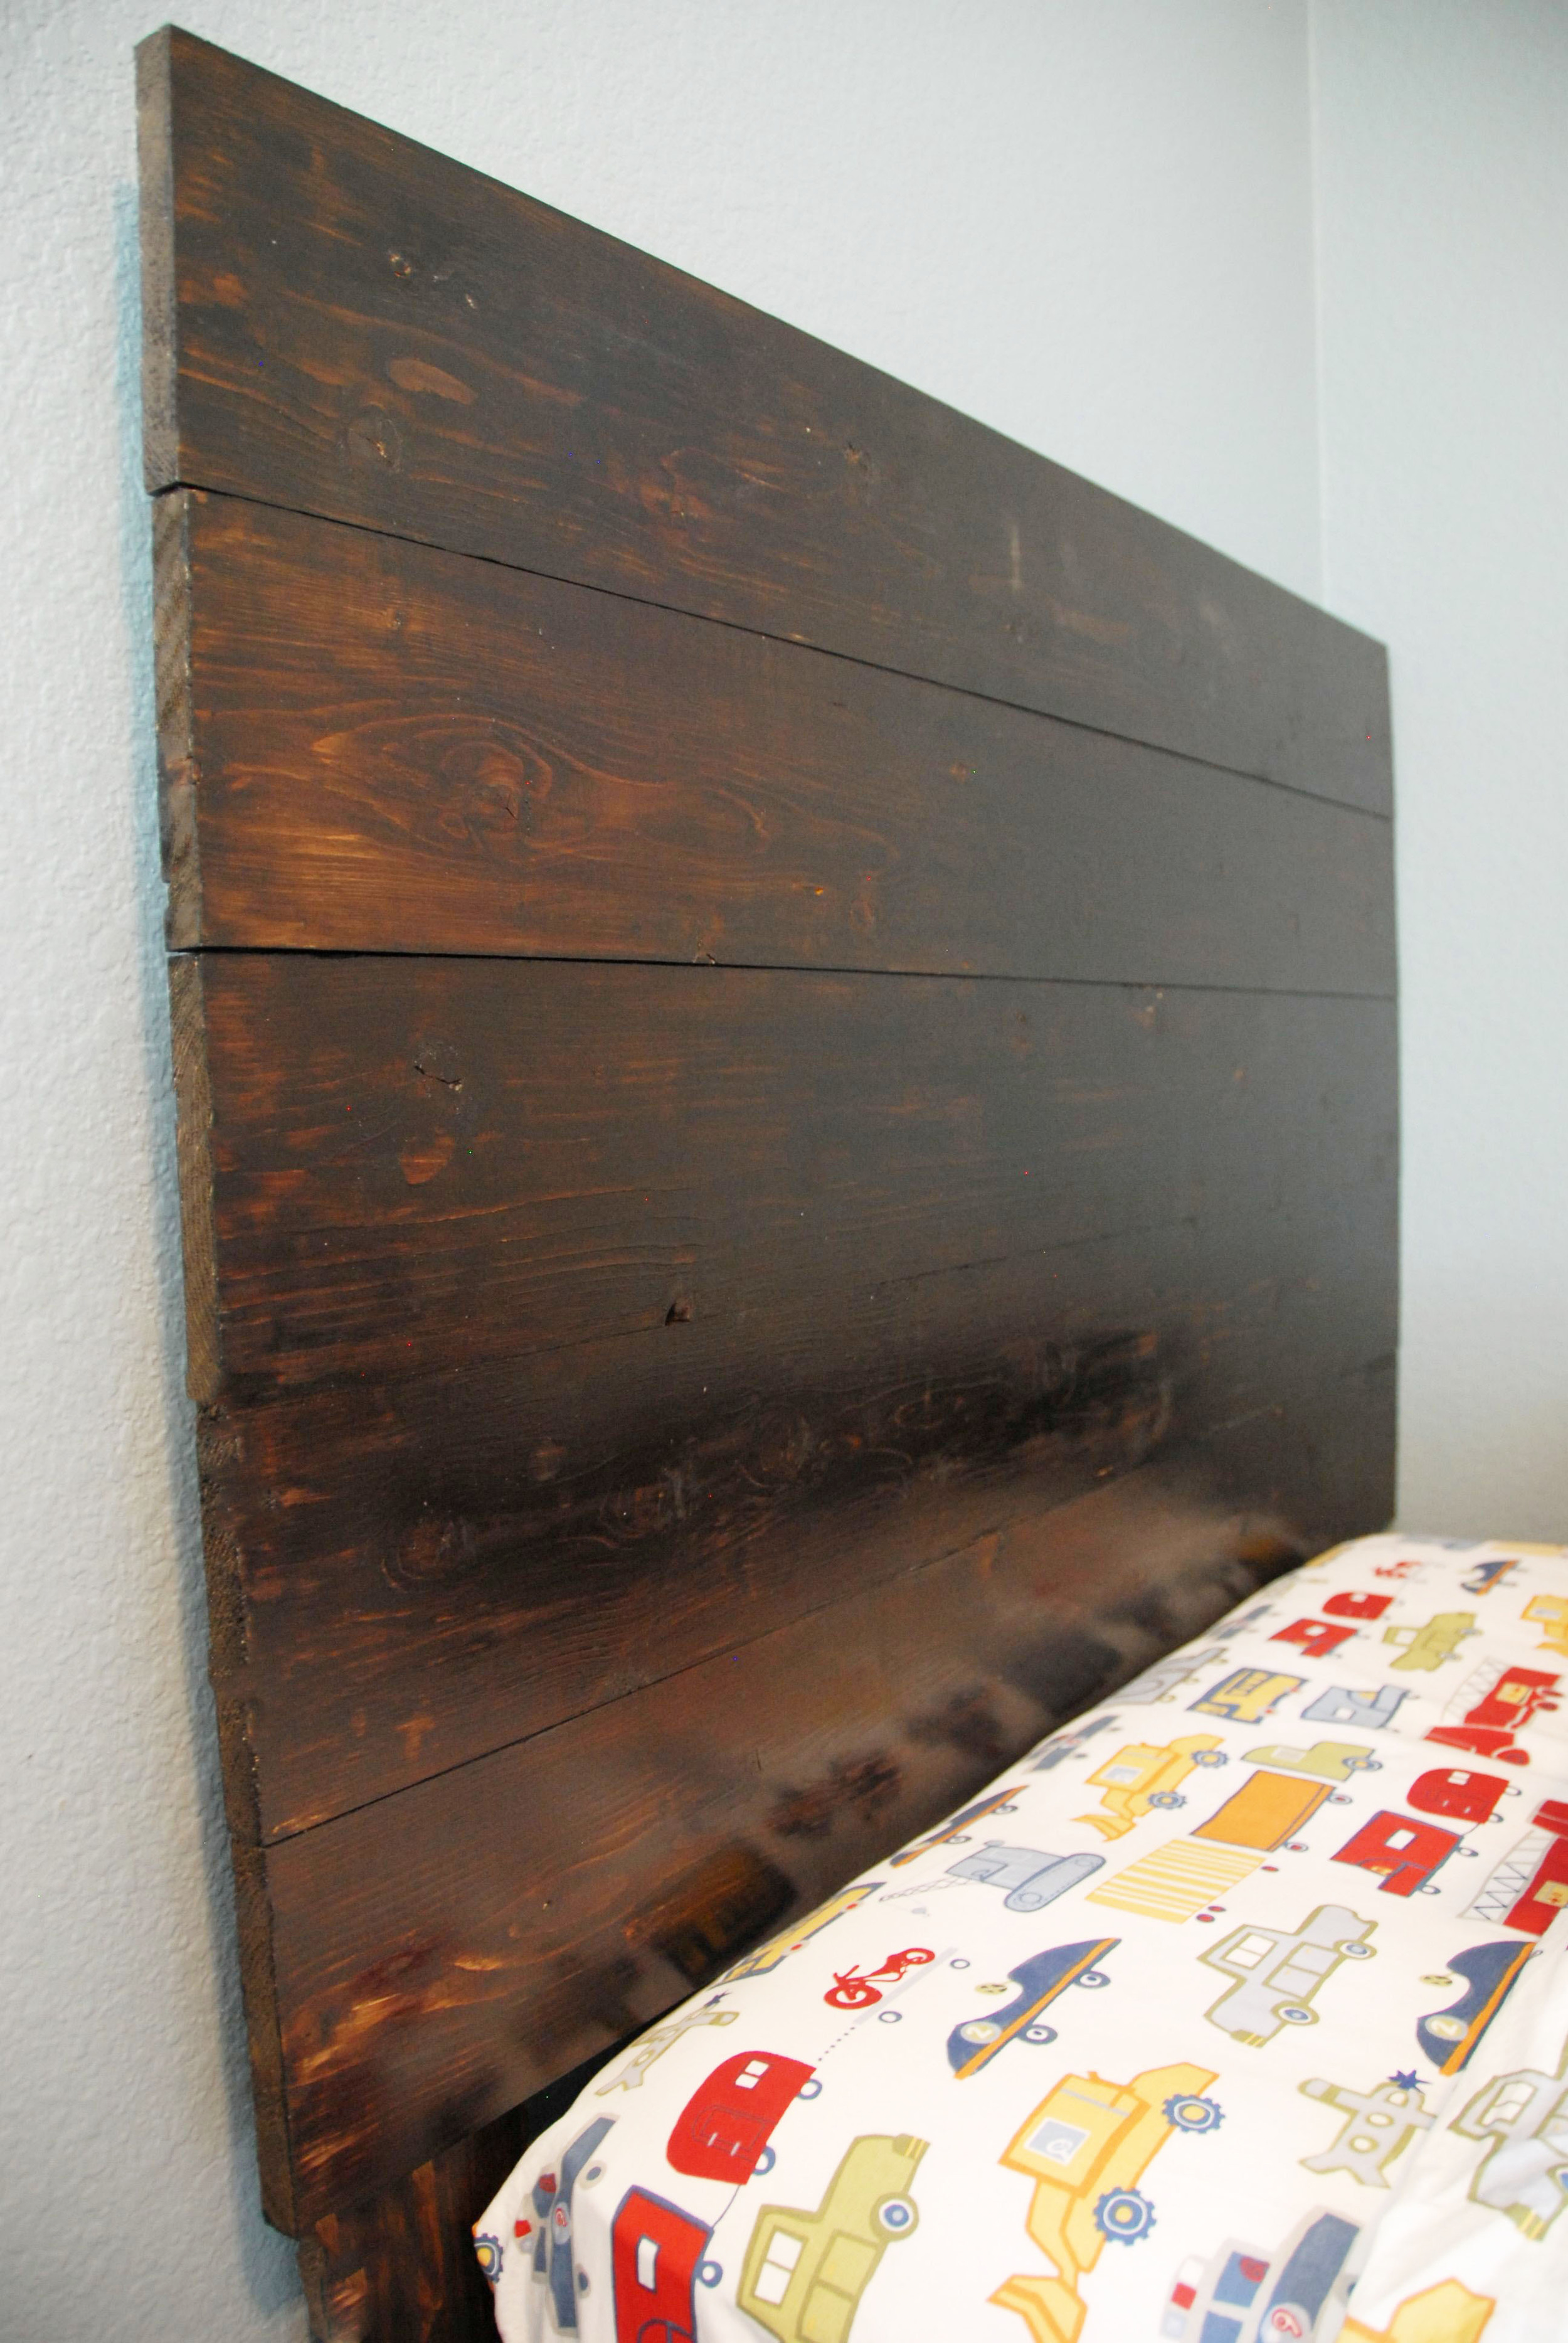
DIY Rustic Headboard SideNot only is this an easy project, but it is also incredibly budget-friendly.
Check this out at the Remodelaholic link party!


